
Base Platform  /  Code Snippet Archive

Code Snippet & Reference Library

Practical how-to guides with code examples, from everyday languages like Python, JavaScript and SQL to many niche tools. Free to read online.

469
Guides Indexed
266
Languages & Tools
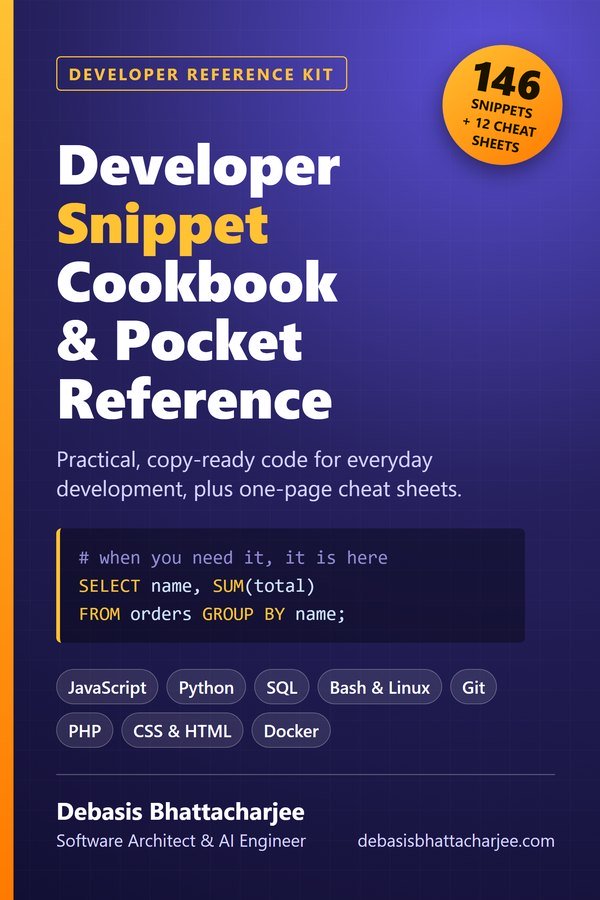
Developer Snippet Cookbook and Pocket Reference PDF cover
Developer Reference Kit · PDF

Developer Snippet Cookbook & Pocket Reference

  • 146 copy-ready snippets: JavaScript, Python, SQL, Bash & Linux, Git, PHP, CSS & HTML, Docker
  • Each one says when to use it, how it works and what to watch out for
  • 12 one-page cheat sheets for Git, Linux, cron, HTTP, SQL, regex and more
  • Code was checked with real tools, and the SQL was run against a sample database
$3.99 one-time · instant email delivery
2,000 Interview Questions & Answers cover
Also available: 2,000 Interview Questions & Answers $7.99 The questions developers get asked in interviews, across 89 topics, with short answers, in-depth explanations, common mistakes and follow-ups. See what's inside →

The material stays free to read online. This is the organised, offline, print-ready PDF edition. Secure payment by PayPal; your personal download link is emailed after payment is confirmed. Digital product, no shipping.

Showing 469 snippets

SNP-2025-0473 Url code examples programming Q&A 2026-04-09

How Can You Harness the Power of URL Programming for Effective Web Development?

▾
THE PROBLEM

In the realm of web development, understanding URL programming is not just beneficial—it’s essential. URLs (Uniform Resource Locators) serve as the backbone for navigating the web, linking resources, and facilitating user interaction with applications. This post delves into the intricacies of URL programming, exploring everything from core concepts to advanced techniques. Whether you're a beginner or an experienced developer, mastering URL programming can significantly enhance your web applications and improve user experience.

A URL is a reference to a web resource that specifies its location on a computer network and a mechanism for retrieving it. URLs are composed of different components, each serving a specific purpose. Understanding these components is crucial for effective URL programming.

  • Scheme: This indicates the protocol used to access the resource, such as HTTP or HTTPS.
  • Host: The domain name or IP address of the server.
  • Port: An optional specification of the port number for the connection (default ports are often omitted).
  • Path: The specific location of the resource on the server.
  • Query: A string of key-value pairs used to pass parameters to the resource.
  • Fragment: A reference to a specific section of the resource.

For example, in the URL https://www.example.com:443/path/to/resource?query=123#section1, each component plays a vital role in resource identification and retrieval.

URLs have been a fundamental part of the web since its inception. Introduced by Tim Berners-Lee in 1994, the URL standard has evolved, adapting to the growing needs of developers and users. As the web expanded, so did the complexity of URLs, leading to the necessity for better handling, encoding, and parsing. Understanding this evolution helps developers appreciate the underlying principles that still govern URL programming today.

To effectively utilize URL programming, developers must be acquainted with several core concepts:

  • URL Encoding: Special characters in URLs must be encoded to ensure they are transmitted correctly. For example, spaces are encoded as %20.
  • Relative vs Absolute URLs: An absolute URL provides the full path to a resource, while a relative URL provides a path relative to the current document.
  • URL Redirection: This technique allows web servers to redirect users from one URL to another, often used for maintaining links after a resource has moved.

Understanding these concepts is crucial for developing web applications that effectively manage resources and user navigation.

URL parameters are key-value pairs appended to a URL, commonly used to pass data to web applications. Here’s a practical example of how to implement and retrieve URL parameters in JavaScript:

function getUrlParameter(name) {
    const urlParams = new URLSearchParams(window.location.search);
    return urlParams.get(name);
}

// Example usage
const userId = getUrlParameter('userId');
console.log(userId); // Outputs the value of 'userId' from the URL

This function retrieves the value of a specified parameter from the URL, which can then be used within your application for various purposes, such as dynamic content loading or user authentication.

Creating clean, user-friendly URLs is essential for both users and search engines. Here are some best practices for structuring URLs:

  • Descriptive URLs: Use clear and descriptive words that indicate the content of the page.
  • Consistent Structure: Maintain a consistent URL structure throughout your site to improve navigation and SEO.
  • Avoid Special Characters: Stick to alphanumeric characters in URLs to avoid encoding issues.
✅ Best Practice: Use hyphens (-) to separate words in URLs instead of underscores (_), as this is more SEO-friendly.

Security is a critical aspect of URL programming. Here are some considerations to keep in mind:

  • Input Validation: Always validate and sanitize user input to prevent injection attacks.
  • HTTPS: Use HTTPS to encrypt data transmitted over the network, protecting user information from eavesdropping.
  • URL Shortening: While URL shorteners are convenient, they can obscure the destination URL. Use them cautiously and educate users about potential risks.
⚠️ Warning: Never expose sensitive information in URLs, such as passwords or personal identifiers, as they can be logged in browser history.

Different web frameworks handle URLs in various ways. Here’s a brief comparison of how popular frameworks manage URL routing:

Framework Routing Approach URL Parameter Support
Express.js Middleware-based routing Dynamic parameters in route definitions
Django URL dispatcher with regex matching Supports named parameters
Flask Simple routing with decorators Dynamic and static parameters

Each framework has its own strengths and weaknesses regarding URL handling, so it's essential to choose one that fits your project requirements.

If you're new to URL programming, here’s a simple guide to get you started:

  1. Understand the components of a URL and their functions.
  2. Learn how to construct URLs with parameters for dynamic content.
  3. Practice using JavaScript or your preferred language to manipulate URLs.
  4. Explore different frameworks and their routing capabilities.
  5. Implement security best practices to protect your applications.

By following these steps, you’ll build a solid foundation in URL programming that will serve you well in your web development journey.

1. What is the difference between a relative URL and an absolute URL?

An absolute URL includes the full path to a resource, including the scheme and host (e.g., https://www.example.com/page), while a relative URL only specifies the path relative to the current location (e.g., /page).

2. How can I encode special characters in a URL?

Use the encodeURIComponent() function in JavaScript to encode special characters in a URL component. For example:

const encodedUrl = encodeURIComponent('Hello World!'); // Results in 'Hello%20World%21'

3. What are URL shorteners, and how do they work?

URL shorteners take a long URL and convert it into a shorter, more manageable link. They work by creating a redirect on their server that points to the original URL, allowing users to access it through the short link.

4. How do I handle URL changes in single-page applications?

Single-page applications (SPAs) often utilize the History API to manage URL changes without reloading the page. Use methods like history.pushState() to update the URL as users navigate through your application.

5. What tools can I use to test my URLs?

Tools like Postman, Curl, and browser developer tools can help you test URLs, validate responses, and troubleshoot issues effectively.

Mastering URL programming is a pivotal skill for web developers, enhancing not only the functionality of your applications but also the overall user experience. By understanding the core concepts, implementing best practices, and considering security and performance, you can harness the power of URLs to build robust, efficient web applications. As web technologies continue to evolve, staying abreast of developments in URL programming will ensure your skills remain relevant and effective. Happy coding!

PRODUCTION-READY SNIPPET

As with any programming concept, developers often encounter common pitfalls when working with URLs. Here are some frequent URL errors and how to address them:

  • 404 Not Found: This error occurs when the server cannot find the requested resource. Ensure that the URL is correct and that the resource exists.
  • 400 Bad Request: This error may arise from malformed URL syntax. Always validate and encode user input before constructing URLs.
  • 403 Forbidden: This indicates that the server understands the request but refuses to authorize it. Check user permissions and authentication.
💡 Tip: Always check URLs for correctness during development to minimize errors in production.
PERFORMANCE BENCHMARK

Optimizing URL performance can greatly enhance the user experience. Here are some techniques to consider:

  • Use Caching: Implement caching strategies for frequently accessed URLs to reduce server load and improve response times.
  • Minimize Redirects: Too many redirects can slow down page load times. Keep redirects to a minimum by ensuring URLs are correctly configured.
  • Compress URL Responses: Use gzip or other compression methods to reduce the size of the data being transmitted.

💡 Tip: Use tools like Google PageSpeed Insights to analyze and optimize URL performance.
Open Full Snippet Page ↗
SNP-2025-0338 Gherkin code examples Gherkin programming 2026-04-09

How Can You Leverage Gherkin Syntax for Effective Behavior-Driven Development?

▾
THE PROBLEM

In the world of software development, clarity and collaboration are crucial. As teams strive to align their understanding of application requirements, Behavior-Driven Development (BDD) emerges as a powerful methodology. At the heart of BDD lies Gherkin, a domain-specific language that allows teams to define application behavior in a readable format. But how can you effectively leverage Gherkin syntax to improve your BDD practices? This post explores the intricacies of Gherkin, offering insights, practical implementation details, and best practices to help you master this essential tool.

Gherkin is a structured language used to write test scenarios in a human-readable format. It serves as a bridge between technical and non-technical stakeholders, enabling collaboration in defining the behavior of software. With its simple syntax, Gherkin allows developers, testers, and business analysts to articulate features and scenarios without delving into complex code.

Gherkin emerged alongside the BDD movement, which sought to address the communication gap between developers and non-technical stakeholders. The language was inspired by the need for clear specifications that could be understood by all parties involved in a project. Gherkin syntax was first popularized through the Cucumber tool, which automates the execution of Gherkin scenarios, creating a seamless integration between documentation and testing.

The syntax of Gherkin is straightforward, utilizing keywords to structure scenarios clearly. Here are the primary keywords:

  • Feature: Describes a feature of the application.
  • Scenario: Represents a specific situation or case.
  • Given: Sets up the initial context.
  • When: Describes the action taken by the user.
  • Then: Specifies the expected outcome.
  • And: Used for additional conditions or actions.

Here’s a simple Gherkin example:


Feature: User login functionality

  Scenario: Successful login
    Given the user is on the login page
    When the user enters valid credentials
    Then the user should be redirected to the dashboard

Step definitions are the glue between your Gherkin scenarios and the code that performs the actual tests. Each step in a Gherkin scenario corresponds to a function in your codebase. Here’s a basic example in Java:


import io.cucumber.java.en.*;

public class UserRegistrationSteps {
    @Given("the user is on the registration page")
    public void userOnRegistrationPage() {
        // Code to navigate to registration page
    }

    @When("the user fills in the registration form")
    public void userFillsRegistrationForm() {
        // Code to fill out the form
    }

    @Then("the user should see a confirmation message")
    public void userSeesConfirmationMessage() {
        // Code to check for confirmation message
    }
}

To maximize the effectiveness of your Gherkin scenarios, follow these best practices:

  • Use the “Given-When-Then” format consistently: This structure helps clarify the flow of each scenario.
  • Keep it business-friendly: Write scenarios in language that is accessible to all stakeholders.
  • Revisit and refine regularly: Ensure scenarios remain relevant as the application evolves.

1. What is the purpose of Gherkin in BDD?

Gherkin serves as a communication tool that enables collaboration between technical and non-technical stakeholders by providing a clear and structured format for defining application behavior.

2. Can Gherkin be used with any programming language?

Yes, Gherkin can be integrated with various programming languages through BDD frameworks like Cucumber (Java, Ruby), SpecFlow (.NET), and Behave (Python).

3. How do I write effective Gherkin scenarios?

To write effective Gherkin scenarios, ensure they are clear, concise, and follow the “Given-When-Then” format. Collaborate with team members to refine them.

4. What are some common mistakes when using Gherkin?

Common mistakes include writing vague scenarios, using overly complex language, and neglecting to maintain scenarios as the application evolves.

5. How can I automate tests using Gherkin?

Tests can be automated by writing step definitions that correspond to your Gherkin scenarios in a BDD framework like Cucumber, SpecFlow, or Behave.

When using Gherkin and BDD, consider the following security best practices:

  • Input Validation: Ensure that all inputs handled in scenarios are validated to prevent security vulnerabilities like SQL injection.
  • Data Privacy: Avoid exposing sensitive data in scenarios. Use anonymized data where possible.
  • Review Scenarios Regularly: Regularly review Gherkin scenarios to identify any security concerns that may arise from changes in application functionality.

When choosing a BDD framework to use with Gherkin, consider the following comparisons:

Framework Language Features Pros Cons
Cucumber Java, Ruby, JavaScript Rich ecosystem, supports various languages Well-documented, strong community Can be complex for beginners
SpecFlow .NET Integration with Visual Studio, .NET tools Seamless integration with .NET projects Limited to .NET ecosystem
Behave Python Lightweight, easy to use Great for Python enthusiasts Smaller community compared to Cucumber

Mastering Gherkin syntax is essential for effective Behavior-Driven Development. By understanding its core concepts, common pitfalls, and best practices, you can create clear, maintainable scenarios that enhance collaboration between technical and non-technical stakeholders. As you implement Gherkin in your projects, remember to focus on clarity, regular maintenance, and performance optimization. With these strategies in mind, you'll be well-equipped to leverage Gherkin to its fullest potential, driving successful outcomes in your software development endeavors.

PRODUCTION-READY SNIPPET

While Gherkin is a powerful tool for BDD, several pitfalls can undermine its effectiveness:

⚠️ Pitfall 1: Vague or ambiguous scenarios.

To avoid this, ensure scenarios are clear, concise, and cover all edge cases. Collaborate with team members to refine them.

⚠️ Pitfall 2: Overly complex scenarios.

Keep scenarios simple. If a scenario becomes too complex, consider breaking it down into smaller, more manageable scenarios.

⚠️ Pitfall 3: Neglecting maintenance.

Regularly review and update your Gherkin scenarios to reflect changes in the application or requirements.

REAL-WORLD USAGE EXAMPLE

To implement Gherkin effectively, you need to integrate it into your development workflow. Typically, this involves the following steps:

  1. Define Features: Start by identifying features of your application that need to be tested.
  2. Write Scenarios: For each feature, write scenarios that describe how users will interact with it.
  3. Automate Tests: Utilize BDD frameworks like Cucumber or SpecFlow to automate these tests.

Here’s an example of how you might define a feature and automate it using Cucumber:


Feature: User registration

  Scenario: Register a new user
    Given the user is on the registration page
    When the user fills in the registration form
    And the user clicks the submit button
    Then the user should see a confirmation message

To automate the scenario, you would create step definitions in your chosen programming language (e.g., Java, Ruby, JavaScript).

PERFORMANCE BENCHMARK

When working with Gherkin and BDD, optimizing the performance of your tests is crucial. Here are some techniques:

  • Parallel Execution: Run tests in parallel to reduce overall execution time. Most BDD frameworks support parallel execution natively.
  • Selective Execution: Use tags to run only a subset of scenarios that are relevant for specific builds or environments.
  • Mocking and Stubbing: Use mocks and stubs to isolate tests from external dependencies, which can speed up test execution.
Open Full Snippet Page ↗
SNP-2025-0103 Xlsx code examples programming Q&A 2026-04-09

How Can You Effectively Manipulate Excel Files Using Xlsx Libraries in Different Programming Languages?

▾
THE PROBLEM

In today's data-driven world, Excel files are ubiquitous and manipulating them programmatically has become an essential skill for developers and data analysts alike. The ability to read from, write to, and modify Excel files using various programming languages opens up a world of automation opportunities and data management efficiencies. This post delves into the intricacies of using Xlsx libraries across different programming languages, focusing on practical implementations, common pitfalls, and advanced techniques. By the end of this guide, you'll be well-equipped to handle Excel files like a pro!

The introduction of Excel by Microsoft in the 1980s revolutionized data management for businesses and individuals. However, as data processing needs grew, so did the demand for programmatic access to Excel files. Over the years, various libraries have emerged across different programming languages, providing robust solutions for manipulating Excel data. Popular libraries like Apache POI for Java, OpenPyXL for Python, and NPOI for .NET have become essential tools for developers.

Understanding the core concepts of Xlsx file manipulation is crucial. At its core, an Excel file consists of cells organized in rows and columns, where each cell can contain data types such as strings, numbers, dates, or formulas. Libraries like Xlsx allow us to interact with these cells programmatically. Some key concepts include:

  • Workbook: Represents the entire Excel file.
  • Worksheet: A single sheet within the workbook.
  • Cell: The individual data point within a worksheet.

Now, let's dive deeper into how to manipulate Excel files using different libraries.

OpenPyXL also allows you to perform advanced operations like formatting cells, adding charts, and more. Here's how to format a cell:

from openpyxl.styles import Font

# Set the font style of the header row
header_font = Font(bold=True, color='FF0000')
for cell in sheet["1:1"]:
    cell.font = header_font

# Save changes
workbook.save('people_formatted.xlsx')

This example bolds the headers and colors them red, showcasing how to enhance the visual presentation of your data.

Apache POI is the go-to library for handling Excel files in Java. Below is a basic example of creating an Excel file:

import org.apache.poi.ss.usermodel.*;
import org.apache.poi.xssf.usermodel.XSSFWorkbook;
import java.io.FileOutputStream;

public class ExcelExample {
    public static void main(String[] args) throws Exception {
        Workbook workbook = new XSSFWorkbook();
        Sheet sheet = workbook.createSheet("People");

        Row headerRow = sheet.createRow(0);
        headerRow.createCell(0).setCellValue("Name");
        headerRow.createCell(1).setCellValue("Age");

        Row row1 = sheet.createRow(1);
        row1.createCell(0).setCellValue("Alice");
        row1.createCell(1).setCellValue(30);

        Row row2 = sheet.createRow(2);
        row2.createCell(0).setCellValue("Bob");
        row2.createCell(1).setCellValue(25);

        FileOutputStream fileOut = new FileOutputStream("people.xlsx");
        workbook.write(fileOut);
        fileOut.close();
        workbook.close();
    }
}

This Java snippet achieves the same result as the Python example, creating an Excel file with a simple data table.

✅ Best Practice: Always validate and sanitize input data when working with Excel files to prevent injection attacks.

When handling sensitive data in Excel files, consider encrypting the files and managing access permissions carefully. Libraries like OpenPyXL support file encryption, which can be a vital feature for secure data handling.

Feature Python (OpenPyXL) Java (Apache POI) C# (EPPlus)
Ease of Use Very High Moderate High
Performance Good Very Good Excellent
Documentation Excellent Good Very Good
Community Support Large Very Large Growing

This comparison provides a quick overview of the strengths and weaknesses of different libraries, helping you choose the right tool for your project.

  • What libraries can I use to manipulate Excel files in Python?
    OpenPyXL, pandas, and XlsxWriter are popular options.
  • Can I read an Excel file without saving it with a specific extension?
    No, Excel requires files to have a .xlsx or .xls extension to be recognized.
  • How do I handle multiple sheets in an Excel file?
    Use the respective library functions to create, read, and write to sheets within a workbook.
  • What should I do if my Excel file is corrupted?
    Try using recovery features in Excel, or use a library that can attempt to read corrupted files.
  • Are there any limits on the number of rows or columns in Excel files?
    Excel has a maximum of 1,048,576 rows and 16,384 columns (up to column XFD).

If you’re new to Excel file manipulation, here’s a quick-start guide:

  1. Choose a programming language (Python, Java, C#, etc.) and install the relevant library.
  2. Create a new project and set up your development environment.
  3. Start coding by following basic examples to create and manipulate Excel files.
  4. Gradually explore advanced features such as formatting, formulas, and charts.

Mastering Excel file manipulation using various Xlsx libraries can greatly enhance your data handling capabilities and improve workflow efficiencies. Whether you're a beginner or a seasoned developer, understanding the nuances of these libraries will enable you to automate tasks and manage data effectively. Armed with the knowledge from this post, you can tackle Excel file manipulation with confidence and skill.

PRODUCTION-READY SNIPPET
⚠️ Common Pitfall: Forgetting to save your workbook can lead to data loss.

Ensure to call the save() method after making changes. If you encounter issues with reading or writing files, double-check your file paths and permissions.

REAL-WORLD USAGE EXAMPLE

OpenPyXL is one of the most popular libraries for Excel file manipulation in Python. Here's a simple example of how to create a new Excel file and write data into it:

from openpyxl import Workbook

# Create a new workbook and select the active worksheet
workbook = Workbook()
sheet = workbook.active

# Write data to the first row
sheet['A1'] = 'Name'
sheet['B1'] = 'Age'
sheet['A2'] = 'Alice'
sheet['B2'] = 30
sheet['A3'] = 'Bob'
sheet['B3'] = 25

# Save the workbook
workbook.save('people.xlsx')

This code snippet demonstrates how to create an Excel file named people.xlsx with a simple data table. You can easily expand this to include more complex data structures.

PERFORMANCE BENCHMARK

When dealing with large datasets, performance can become an issue. Here are some strategies to optimize performance:

  • Batch Processing: Instead of writing data cell by cell, write in batches to reduce I/O operations.
  • Streaming API: Use libraries like Apache POI's SXSSF for handling large Excel files without consuming too much memory.
  • Minimize Formatting: Excessive formatting can slow down processing speed; apply it judiciously.
Open Full Snippet Page ↗
SNP-2025-0127 Latte code examples Latte programming 2026-04-09

How Are Functional Programming Concepts Gaining Popularity in Latte?

▾
THE PROBLEM

In the ever-evolving landscape of programming languages, Latte has emerged as a fascinating choice for developers interested in a blend of object-oriented and functional programming paradigms. The growing interest in functional programming concepts within Latte raises an essential question: how are these concepts being integrated into this relatively new language? Understanding this integration is crucial for developers seeking to leverage the full potential of Latte in modern applications.

Functional programming (FP) has its roots in mathematical functions and has gained traction due to its compatibility with concurrent and parallel programming. Languages such as Haskell and Scala pioneered these concepts, emphasizing immutability, first-class functions, and higher-order functions. With the increasing complexity of software systems, developers have recognized the advantages of FP, including easier reasoning about code, fewer side effects, and enhanced testability.

Latte, designed as a versatile language, has started to incorporate these functional programming principles, making it an attractive choice for developers familiar with FP. As Latte continues to evolve, understanding how it integrates these concepts can help developers create more robust and maintainable applications.

Latte’s design allows for the application of several key functional programming concepts:

  • First-Class Functions: In Latte, functions can be treated as first-class citizens, meaning they can be assigned to variables, passed as arguments, and returned from other functions.
  • Higher-Order Functions: Functions that take other functions as parameters or return functions as results are easily implemented in Latte, enabling powerful abstractions.
  • Immutability: While not strictly enforced, Latte encourages immutability where possible, leading to safer code with fewer unintended side effects.
  • Function Composition: Combining simple functions to build more complex operations is easily achievable in Latte, allowing for cleaner and more readable code.

Latte supports both functional and object-oriented programming paradigms. Here's a comparison of how certain aspects differ:

Aspect Functional Programming Object-Oriented Programming
State Management Immutable data structures are preferred. Mutable state is common.
Functions First-class functions and function composition. Methods within classes.
Code Reusability Higher-order functions and function chaining. Inheritance and polymorphism.
Side Effects Aims to minimize side effects. Encourages encapsulation of state and behavior.

Understanding these differences allows developers to choose the appropriate paradigm based on the problem at hand, leveraging the strengths of Latte's design.

Here are some best practices to consider when applying functional programming concepts in Latte:

  • Use Pure Functions: Whenever possible, create functions that do not have side effects. This leads to easier testing and debugging.
  • Embrace Composition: Favor function composition over deeply nested function calls. This enhances readability and maintainability.
  • Limit Side Effects: If a function must have side effects, clearly document them to prevent confusion for other developers.
  • Write Small Functions: Small, focused functions are easier to test and reason about. Aim for functions that do one thing well.

Security is paramount in software development. Here are some security best practices when working with functional programming in Latte:

  • Input Validation: Always validate inputs to functions to avoid unexpected behavior and potential security vulnerabilities.
  • Limit Exposure of State: Encapsulate state within functions to prevent unauthorized access from outside code.
  • Use Libraries with Care: When utilizing third-party libraries, ensure they are well-maintained and have a good security track record.

If you're new to Latte and functional programming, here's a quick start guide to get you on your way:

  1. Install Latte: Follow the installation guide from the official Latte documentation.
  2. Familiarize Yourself with Syntax: Get comfortable with Latte's syntax by reviewing basic examples.
  3. Experiment with Functional Concepts: Start writing simple functions and gradually incorporate higher-order functions and immutability.
  4. Join the Community: Engage with the Latte community for support, resources, and updates.
1. What are the main advantages of using functional programming in Latte?
Functional programming promotes cleaner code, easier testing, and fewer side effects, making it easier to reason about complex systems.
2. Can I mix functional and object-oriented programming in Latte?
Yes, Latte supports both paradigms, allowing developers to choose the most suitable approach for their specific use case.
3. How can I handle errors in functional programming in Latte?
Use error handling techniques such as Result types or Exceptions to manage errors without compromising functional purity.
4. Are there any performance downsides to functional programming?
While functional programming can lead to cleaner code, excessive use of immutability and higher-order functions may introduce performance overhead if not managed properly.
5. What resources can I use to learn more about functional programming in Latte?
Check out the official Latte documentation, online courses, and community forums for tutorials and insights.

Functional programming concepts are gaining popularity in Latte, offering developers a powerful toolkit for building maintainable and robust applications. By leveraging first-class functions, higher-order functions, and immutability, developers can create cleaner and more efficient code. However, it is essential to remain aware of the challenges and pitfalls associated with functional programming.

As Latte continues to evolve, embracing functional programming principles will likely enhance its usability and performance, making it a compelling choice for modern software development. Whether you are a beginner or an experienced developer, understanding and applying these concepts can significantly improve your programming journey in Latte. 💡

REAL-WORLD USAGE EXAMPLE

To illustrate how functional programming concepts can be applied in Latte, consider the following code example:


// Define a simple function
let add = (x: Int, y: Int) -> Int {
    return x + y
}

// Higher-order function that takes another function as an argument
let applyFunction = (f: (Int, Int) -> Int, a: Int, b: Int) -> Int {
    return f(a, b)
}

// Using the higher-order function
let result = applyFunction(add, 5, 3) // result will be 8

This example demonstrates first-class functions and higher-order functions effectively. The applyFunction takes another function as an argument, showcasing how functional programming principles can simplify complex operations.

COMMON PITFALLS & GOTCHAS

While functional programming offers many benefits, developers should be aware of common pitfalls:

⚠️ Over-using Immutability: While immutability can lead to safer code, excessive use can lead to performance issues. Always evaluate the trade-offs.
⚠️ Complexity of Higher-Order Functions: Higher-order functions can make code harder to read if overused. Ensure that the code remains understandable.
⚠️ Debugging Challenges: Debugging functional code can be more challenging due to the absence of mutable state. Familiarize yourself with functional debugging tools.
PERFORMANCE BENCHMARK

Optimizing functional code for performance is crucial, especially as applications scale. Here are some techniques:

  • Tail Call Optimization: Ensure that your recursive functions can take advantage of tail call optimization to avoid stack overflow errors.
  • Memoization: Cache results of expensive function calls to improve performance. This is particularly useful for functions with repetitive calculations.
  • Profiling and Benchmarking: Regularly profile your code to identify bottlenecks. Use benchmarking tools to compare performance across different implementations.
Open Full Snippet Page ↗
SNP-2025-0477 Vhdl code examples programming Q&A 2026-04-09

How Can You Effectively Utilize VHDL for FPGA Design Optimization?

▾
THE PROBLEM

Field Programmable Gate Arrays (FPGAs) are highly versatile devices that allow hardware design engineers to implement complex digital circuits. VHDL (VHSIC Hardware Description Language) is one of the primary languages used for designing and simulating digital systems in FPGAs. Understanding how to optimize VHDL code can lead to significant improvements in performance, resource utilization, and power consumption. This post delves into effective strategies for using VHDL in your FPGA design, along with practical tips, common pitfalls, and advanced techniques.

FPGA resources are limited, and the choice of how to utilize those resources can greatly impact the performance of the designed system. Optimization in VHDL is crucial for:

  • Performance: Faster execution times and reduced latency.
  • Resource Utilization: Efficient use of FPGA logic elements, registers, and memory.
  • Power Consumption: Lower power usage, which is particularly important in battery-operated devices.

Before diving into practical implementations, it’s essential to grasp the core concepts of optimization in VHDL:

  • Parallelism: Exploiting the inherent parallel nature of FPGAs.
  • Pipelining: Breaking down operations into stages to improve throughput.
  • Resource Sharing: Reusing hardware components to save space and power.

To maximize the effectiveness of your VHDL code, consider the following best practices:

  • Use descriptive names for signals and processes to enhance readability.
  • Employ conditional compilation for debugging and testing without altering the main design.
  • Leverage libraries and packages to promote code reuse.

Security is often overlooked in hardware design, but it’s just as critical as in software development. Here are key considerations:

  • Access Control: Implement mechanisms to prevent unauthorized access to sensitive data.
  • Data Integrity: Ensure data integrity checks are in place to prevent tampering.
  • Documentation: Maintain clear documentation to assist in audits and compliance checks.
⚠️ Always consider potential vulnerabilities in your design!
  • What is the primary purpose of VHDL?
    VHDL is used for describing digital electronic systems, enabling simulation and synthesis for hardware implementation.
  • How do I debug VHDL code?
    Utilize simulation tools to trace signals and analyze the behavior of your VHDL code during execution.
  • Can VHDL be used for high-level synthesis?
    Yes, VHDL can be used to generate RTL designs that can be further synthesized into hardware.
  • What are the differences between VHDL and Verilog?
    VHDL is more verbose and strongly typed, while Verilog is more concise and easier for quick prototyping.
  • How can I improve my VHDL skills?
    Practice by working on real-world projects, participating in forums, and reviewing existing code.

If you’re new to VHDL, here’s a quick-start guide to help you get going:

  1. Start with basic syntax and structure.
  2. Implement simple designs like counters and shift registers.
  3. Gradually move to more complex designs such as state machines and arithmetic units.
  4. Utilize simulation tools to validate your designs.
  5. Join VHDL communities for support and knowledge sharing.

Optimizing VHDL code for FPGA design is a multifaceted task that requires an understanding of various principles and techniques. By leveraging parallelism, pipelining, resource sharing, and adhering to best practices, you can significantly enhance the performance and efficiency of your designs. Remember to consider security implications and common pitfalls while continuously seeking to improve your skills. As technology evolves, staying updated with the latest developments in VHDL will ensure you remain at the forefront of FPGA design optimization.

PRODUCTION-READY SNIPPET

Even with the best intentions, optimization can lead to unexpected issues. Here are some common pitfalls and their solutions:

1. Over-Optimization

While it’s important to optimize, over-optimization can lead to complex designs that are difficult to maintain. Strive for a balance between optimization and code readability.

Tip: Always comment your code to explain the rationale behind optimizations.

2. Ignoring Timing Constraints

Ignoring timing constraints can lead to designs that function correctly in simulation but fail in hardware. Always validate your design against the timing requirements of your FPGA.

3. Not Leveraging FPGA-Specific Features

Many FPGAs have specific features such as DSP blocks and dedicated memory. Not utilizing these can leave performance on the table.

✅ Make use of FPGA vendor tools to analyze and optimize resource usage!
REAL-WORLD USAGE EXAMPLE

Here are several practical techniques that can be employed to optimize VHDL code:

1. Utilizing Concurrent Statements

One of the most powerful features of VHDL is its ability to define concurrent operations. By using concurrent statements, multiple processes can execute simultaneously, leveraging FPGA parallelism. For example, consider the following:


architecture Behavioral of MyCircuit is
begin
  process (A, B) 
  begin
    C <= A and B;
  end process;
  
  process (A, B) 
  begin
    D <= A or B;
  end process;
end Behavioral;

This code defines two processes that can run at the same time, thus improving execution speed.

2. Pipelining

Pipelining is a technique where multiple stages of computation are performed in parallel. Each stage processes a different data element, which can lead to substantial performance improvements. Consider the following example of a simple pipeline:


architecture Pipelined of MyPipeline is
  signal stage1, stage2: std_logic_vector(7 downto 0);
begin
  process (clk)
  begin
    if rising_edge(clk) then
      stage1 <= data_in;
      stage2 <= stage1 + 1;
      data_out <= stage2;
    end if;
  end process;
end Pipelined;

This example demonstrates a two-stage pipeline, where each clock cycle allows a new input to be processed while the previous results are still being computed.

3. Resource Sharing

Resource sharing allows multiple operations to use the same hardware resources. This can save power and area on the FPGA. Here’s an example of a shared adder:


architecture SharedResource of MyAdder is
  signal result: std_logic_vector(7 downto 0);
begin
  process (A, B)
  begin
    result <= A + B;
  end process;

  -- Other operations can use the same result
end SharedResource;

By carefully sharing resources, you can minimize the number of logic elements used in your design.

PERFORMANCE BENCHMARK

In addition to the previously mentioned techniques, here are specific performance optimization strategies that can be used:

1. Loop Unrolling

Loop unrolling can significantly increase performance by reducing loop overhead. Here’s an example:


architecture Unrolled of MyMultiplier is
begin
  result <= A * B;  -- Instead of using a loop, directly calculate for small values
end Unrolled;

2. State Machine Optimization

When implementing state machines, ensure that the number of states is minimized to reduce the complexity of your design. Here’s a simple optimized state machine:


architecture SM_optimized of MyStateMachine is
  type state_type is (StateA, StateB, StateC);
  signal current_state, next_state: state_type;
begin
  process (clk)
  begin
    if rising_edge(clk) then
      current_state <= next_state;
    end if;
  end process;

  process (current_state, input_signal)
  begin
    case current_state is
      when StateA =>
        next_state <= StateB;
      when StateB =>
        if input_signal = '1' then
          next_state <= StateC;
        else
          next_state <= StateA;
        end if;
      when others =>
        next_state <= StateA; -- Default case
    end case;
  end process;
end SM_optimized;
Open Full Snippet Page ↗
SNP-2025-0019 Tech 2026-04-08

Understanding how Links and protocols works 🚀

▾
THE PROBLEM

A link is essentially composed of two distinct segments. The first part determines the protocol and server address, which can be specified either through a domain name or an IP address. The second part represents the document path appended to the address. For instance, consider the following document address:

https://estudiopatagon.com/contact/

Breaking it down:

  • Protocol (https): Specifies the communication protocol to be used. In this case, it's HyperText Transfer Protocol Secure, denoted by "https."
  • Domain Name (estudiopatagon.com): Identifies the server's location using a human-readable domain name. It points to the server that hosts the website.
  • Document URL (/contact/): Represents the specific path of the document relative to the server's root path. It guides the server to the exact location of the requested content.

Once a link is clicked, the web browser sends a request to the specified server using the provided protocol, domain name, and document path. The web server, in turn, is responsible for interpreting this request.

Once identified, the server serves the file as the response, allowing the browser to render and display the content.

The server analyzes the request, extracts the document path, and searches its directory structure for the corresponding file.

computer screen displaying files
Photo by Ferenc Almasi / Unsplash

In essence, the web server acts as the interpreter and provider, ensuring that the correct response is delivered based on the user's request. This seamless interaction between the browser and the server is fundamental to the functionality of the World Wide Web.

As we continue our exploration, we'll delve deeper into the intricacies of web development, understanding how links, protocols, and servers collaborate to deliver the web content we interact with daily.

Stay tuned for a deeper dive into the mechanics of web navigation and document retrieval.

Open Full Snippet Page ↗
SNP-2025-0227 Bro Bro programming code examples 2026-04-08

How Can You Effectively Utilize Bro for Network Security Monitoring?

▾
THE PROBLEM

In an era where network security is of paramount importance, the ability to monitor and respond to threats in real-time has become a necessity for organizations. Bro, now known as Zeek, is a powerful network analysis framework that provides deep insight into network traffic, making it an invaluable tool for network security monitoring. This blog post explores how to effectively utilize Bro for network security monitoring, addressing key concepts, practical implementation details, and advanced techniques. By the end, you'll have a comprehensive understanding of how to leverage Bro to enhance your network security posture.

Developed at Lawrence Berkeley National Laboratory in the late 1990s, Bro was designed to address the need for a robust network monitoring solution that could analyze network traffic in real-time. Over the years, Bro has evolved into Zeek, reflecting its broader functionality beyond just intrusion detection. Zeek provides a scriptable framework that allows security analysts to define custom protocols and analyze traffic patterns, making it a versatile tool in the security analyst's toolkit.

To effectively utilize Bro for network security monitoring, it's important to understand some core technical concepts:

  • Event-driven Architecture: Bro operates on an event-driven model, where various network events trigger specific actions or scripts, allowing for real-time monitoring and response.
  • Protocol Analysis: Bro supports a wide range of protocols, providing detailed analysis that includes application-layer data.
  • Scriptable Language: Bro's scripting language allows users to write custom scripts to define how to process specific events, enabling tailored responses to network incidents.

Once you have a basic understanding of Bro's functionalities, you can delve into advanced techniques to enhance your monitoring capabilities:

1. Custom Scripts

Bro’s scripting language allows you to create custom scripts that can analyze traffic according to your specific needs. Here’s an example script that logs HTTP requests:

event http_request(c: connection, method: string, host: string, uri: string) {
    print fmt("HTTP Request: %s %s", method, uri);
}

2. Anomaly Detection

You can implement anomaly detection scripts to identify unusual patterns in network traffic. For example, you can create a script that alerts you when a large number of connections to a single host occur:

event connection_established(c: connection) {
    if (c$id$resp == 80 && c$id$orig_h == 192.168.1.1) {
        if (count(connections[c$id$orig_h]) > 100) {
            print "Anomaly detected!";
        }
    }
}
💡 Best Practices: Regularly update your Bro installation to leverage new features and security patches. Use version control for your scripts to track changes and collaborate with your team.

1. Regular Updates

Keeping your Bro installation updated is crucial for maintaining security and functionality. The Bro community actively develops updates with new features and bug fixes, so check for updates regularly.

2. Utilize Community Scripts

The Bro community has developed a plethora of scripts available for various use cases. Consider leveraging these existing scripts instead of developing from scratch, which can save time and resources.

Security is a critical aspect when deploying Bro in a production environment:

1. Network Segmentation

Deploy Bro on a dedicated network segment to minimize the risk of exposure to attacks. This practice helps isolate the monitoring tool from potential threats.

2. Access Control

Implement strict access controls to the Bro system. Use role-based access control (RBAC) to ensure that only authorized personnel can interact with the monitoring data.

1. What is the difference between Bro and Snort?

Bro (Zeek) is primarily focused on traffic analysis and providing high-level insights, while Snort is mainly an intrusion detection system that focuses on packet-based inspection.

2. Can Bro be used for real-time alerting?

Yes, Bro can be configured to send alerts in real-time using scripts that trigger on specific events or anomalies.

3. How does Bro handle encrypted traffic?

Bro can analyze metadata from encrypted traffic, but it cannot decrypt the payload without the appropriate keys. Implementing SSL/TLS decryption can enhance visibility.

4. Is Bro suitable for small networks?

While Bro is designed for high-throughput environments, it can be configured for smaller networks by filtering traffic and optimizing script performance.

5. What logs does Bro generate?

Bro generates various logs, including connection logs, HTTP logs, DNS logs, and more, which can be analyzed for security incidents.

Bro (Zeek) is a powerful tool for network security monitoring that offers deep insights into network traffic through its event-driven architecture and scriptable language. By understanding core technical concepts, implementing effective monitoring strategies, and adhering to best practices, you can significantly enhance your organization’s security posture. Whether you are a beginner or an advanced user, leveraging Bro for network security will equip you with the necessary capabilities to proactively manage and respond to network threats. With continuous updates and a supportive community, Bro remains a vital resource in the ever-evolving field of network security.

PRODUCTION-READY SNIPPET

While using Bro can be highly beneficial, there are common pitfalls to be aware of:

1. Misconfiguration

One of the most common issues is misconfiguration. Always double-check your bro.cfg settings and ensure that the correct interfaces are specified. Use the broctl check command to validate your configuration.

2. Performance Overhead

Monitoring high-throughput networks can introduce performance overhead. To mitigate this, consider filtering the traffic you capture. You can use BPF (Berkeley Packet Filter) syntax to specify which traffic to monitor:

bro -i eth0 'tcp port 80'
REAL-WORLD USAGE EXAMPLE

Implementing Bro for network security monitoring involves several steps:

1. Installation

To get started, you need to install Bro on your system. It can be installed on various operating systems, including Linux and macOS. Here's a quick guide for Ubuntu:

sudo apt update
sudo apt install bro

Ensure that you have the necessary dependencies installed, such as pcap and libssl.

2. Configuration

After installation, you'll need to configure Bro to suit your network environment. The main configuration file is bro.cfg located in the /usr/local/bro/etc/ directory. Here, you can specify network interfaces and customize logging options.

# Set the network interface
@load policy/protocols/http
redef LogAscii::use_json = T;
redef Site::local_nets += [ 192.168.1.0/24 ];

3. Starting Bro

Once configured, you can start Bro using the following command:

broctl start

This command will initiate the monitoring process based on your configuration settings.

PERFORMANCE BENCHMARK

Optimizing the performance of Bro can significantly enhance its efficacy in real-time monitoring:

1. Traffic Filtering

Filtering unnecessary traffic not only improves performance but also reduces the volume of logs generated. Use BPF to capture only relevant traffic:

bro -i eth0 'tcp and not port 22'

2. Script Optimization

Review your custom scripts for efficiency. Avoid overly complex logic that could slow down processing and consider using built-in Bro functions for common tasks.

Open Full Snippet Page ↗
SNP-2025-0382 Tex code examples programming Q&A 2026-04-08

How Can You Harness the Power of TeX for Professional Document Preparation?

▾
THE PROBLEM

TeX is a powerful typesetting system that has become a standard for typesetting documents, especially in academia and for complex documents like technical papers, theses, and books. Understanding TeX is crucial for professionals who require high-quality document preparation. The question of how to effectively harness the power of TeX for document preparation is essential for anyone aiming to produce professional-level outputs. This guide delves into the core concepts, practical applications, advanced techniques, and the common pitfalls encountered when using TeX.

TeX was created by Donald Knuth in the late 1970s to address the challenges of typesetting mathematical content in a visually appealing manner. At its core, TeX was designed to be a high-quality typesetting system that provides precise control over document formatting. Over the years, it has evolved significantly, and numerous packages and extensions have been developed to enhance its capabilities. Understanding this historical background helps users appreciate the power and flexibility of TeX in modern document preparation.

TeX operates on a markup system where users define how the text should be formatted rather than manually formatting it. Key concepts include:

  • Document Structure: TeX documents typically start with a preamble that defines the document class and packages used.
  • Commands and Environments: Commands (e.g., textbf) control formatting, while environments (e.g., document) structure the document.
  • Math Typesetting: TeX excels in formatting complex mathematical expressions, making it a favorite among scientists and mathematicians.

Here’s a basic example of a TeX document structure:

documentclass{article}
begin{document}
Hello, World!
end{document}

For beginners, getting started with TeX can be daunting. Here’s a quick-start guide to help you kick off your TeX journey:

  1. Install a TeX distribution: Popular options include TeX Live, MiKTeX, and MacTeX.
  2. Choose an editor: Use a dedicated TeX editor like TeXworks, Overleaf, or Emacs with AUCTeX for more advanced features.
  3. Create your first document: Start with a simple document and gradually add complexity.

Here’s an example of a minimal TeX document:

documentclass{article}
begin{document}
title{My First TeX Document}
author{John Doe}
maketitle
This is a simple document created using TeX.
end{document}
💡 Tip: Always keep your TeX packages updated to access the latest features and bug fixes.

Here are some best practices to follow when preparing documents with TeX:

  • Use modular documents: Break large documents into smaller files using the input or include commands for easier management.
  • Comment your code: Use the % symbol to add comments explaining complex sections of your code.
  • Consistent formatting: Define custom commands for repetitive formatting tasks to maintain consistency.

When working with TeX documents, especially in collaborative environments, security is crucial. Here are some best practices:

  • Validate external files: Always ensure that any external files (graphics, bibliographies) are from trusted sources to avoid malicious code.
  • Use version control: Track changes using version control systems like Git to manage document revisions and collaborate safely.
  • Backup regularly: Keep backups of your documents to prevent data loss from accidental deletions or corruption.

Once you're comfortable with the basics of TeX, you can explore advanced features that enhance document presentation:

  • Custom environments: Create your own environments to encapsulate specific formatting styles.
  • Bibliography management: Use BibTeX or BibLaTeX for managing references automatically.
  • Custom layouts: Modify page dimensions and margins using the geometry package for unique document presentations.

Here’s an example of how to create a custom environment:

newenvironment{myenv}
{begin{quote}}
{end{quote}}

begin{myenv}
This is a custom environment!
end{myenv}

While TeX is powerful, alternatives like Markdown, LaTeX (which is built on TeX), and word processors exist. Here’s a brief comparison:

Feature TeX/LaTeX Markdown Word Processors
Typesetting Quality High Medium Medium
Learning Curve Steep Low Low
Mathematics Support Excellent Poor Limited
Collaboration Moderate High (via Git) High

1. What is the difference between TeX and LaTeX?

TeX is a typesetting system, while LaTeX is a set of macros built on top of TeX that simplifies its use for document preparation.

2. How do I include graphics in a TeX document?

Use the graphicx package and the includegraphics command:

usepackage{graphicx}
includegraphics[width=linewidth]{image.png}

3. How can I create a bibliography in TeX?

Use BibTeX or BibLaTeX, and include references in a .bib file. Then, use the bibliography command in your document to include them.

4. Is TeX suitable for non-technical documents?

Yes, while TeX excels with technical documents, it can be used for any type of document that requires high-quality typesetting.

5. Can I use TeX for presentations?

Yes, the beamer package allows users to create professional presentations using TeX.

TeX is an invaluable tool for professionals in need of high-quality document preparation, especially in technical fields. By understanding its core concepts, utilizing best practices, and exploring advanced techniques, you can fully harness its capabilities. Whether you're a beginner or an experienced user, the guidelines and tips provided in this post will help you navigate the complexities of TeX with confidence. As you continue to learn and adapt, remember that the TeX community is vast and supportive, offering countless resources and forums for assistance. Embrace the power of TeX to elevate your document preparation to a professional level! ✅

PRODUCTION-READY SNIPPET

Even experienced users run into errors when working with TeX. Here are some common error codes and their solutions:

Error Code Description Solution
! Undefined control sequence This error occurs when TeX encounters a command it does not recognize. Check for typos in the command or ensure the necessary package is included.
! Missing $ inserted This indicates that TeX expected a math mode but found text. Ensure that you are in the correct mode or add the necessary math delimiters.
! Overfull hbox This warning indicates that text is too wide for the line. Consider adjusting the text or using hyphenation.
PERFORMANCE BENCHMARK

While TeX is efficient, large documents can lead to increased compilation times. Here are some techniques to optimize performance:

  • Use the draft option: For drafts, use the documentclass[draft]{article} option to speed up compilation by omitting figures and other elements.
  • Limit packages: Only include the packages you need. Each package adds overhead and can slow down the document processing.
  • Compile selectively: Use the includeonly command to compile only specific chapters of a multi-file document.
Open Full Snippet Page ↗
SNP-2025-0335 Gamemakerlanguage code examples Gamemakerlanguage programming 2026-04-08

How Can You Leverage Gamemakerlanguage to Create Compelling Game Mechanics?

▾
THE PROBLEM

In the realm of game development, the mechanics of a game are crucial to its success. Gamemakerlanguage (GML) provides a robust and flexible environment for developers to implement intricate game mechanics efficiently. Understanding how to leverage GML to create engaging and compelling mechanics can set your game apart in a competitive market. This post dives deep into GML, exploring its capabilities, common pitfalls, and best practices for crafting game mechanics that captivate players.

Gamemakerlanguage was introduced as the scripting language for YoYo Games' GameMaker Studio. Initially created to streamline game development, GML has evolved significantly over the years. It combines the ease of use of high-level languages with the control necessary for fine-tuning games. The evolution of GML has made it a favorite among indie developers, allowing them to create everything from simple 2D platformers to complex RPGs.

Before diving into the specifics of game mechanics, it's essential to understand some core concepts of GML. The language is event-driven, meaning that it reacts to user inputs or game events. Key elements include:

  • Objects: The fundamental building blocks in GML, which can represent anything from characters to interactive items.
  • Events: Triggers that execute code, such as Mouse Click or Key Press.
  • Actions: The code executed in response to events, allowing for complex interactions and behaviors.
💡 Tip: Familiarize yourself with the object-oriented nature of GML as it can significantly enhance your ability to create organized and modular game mechanics.

Let’s start with a simple mechanic: player movement. Below is a basic implementation of character movement using keyboard inputs:

if (keyboard_check(vk_left)) {
    x -= 5; // Move left
}
if (keyboard_check(vk_right)) {
    x += 5; // Move right
}
if (keyboard_check(vk_up)) {
    y -= 5; // Move up
}
if (keyboard_check(vk_down)) {
    y += 5; // Move down
}

This code snippet checks for keyboard inputs and adjusts the player's position accordingly. By understanding these basic mechanics, you can build more complex interactions.

Interactions are key to engaging gameplay. In GML, you can easily create interactions between different objects. For instance, consider a collectible item that increases the player’s score:

// In the collectible object
if (place_meeting(x, y, obj_player)) {
    obj_player.score += 1; // Increase player's score
    instance_destroy(); // Remove the collectible
}

This code checks if the player collides with the collectible object, updates the score, and then removes the collectible from the game. Interactivity enhances player engagement and adds depth to gameplay.

Combat systems can drastically change the dynamics of gameplay. Below is a simplified combat mechanic where the player can attack an enemy:

if (keyboard_check_pressed(vk_space)) {
    var damage = 10;
    if (place_meeting(x, y, obj_enemy)) {
        obj_enemy.health -= damage; // Deal damage to enemy
    }
}

This implementation checks if the spacebar is pressed and then applies damage if the player is in contact with the enemy object. You can expand this mechanic to include animations, health regeneration, or different attack types.

Implementing effective game mechanics in GML requires thoughtful planning and execution. Here are some best practices:

  • Modular Code: Break your code into functions to enhance readability and reusability. This also simplifies debugging.
  • Consistent Naming Conventions: Use clear and consistent naming for variables and objects to make your code easier to understand.
  • Regular Testing: Continuously test your mechanics to identify potential issues early in development.
✅ Best Practice: Use comments extensively to explain complex logic. This will help not just you, but any collaborators who may work on the project.

Security is often overlooked in game development, but it’s essential to protect your game from exploits:

  • Input Validation: Ensure inputs are validated to prevent unintended actions or exploits.
  • Data Protection: Store sensitive information securely and avoid hardcoding sensitive keys or credentials into your game.
⚠️ Security Tip: Regularly update your game to patch any vulnerabilities that may arise, especially if you are using third-party libraries.

If you are new to GML, here’s a short guide to kick-start your journey:

  1. Familiarize yourself with the GameMaker Studio interface.
  2. Learn the basic syntax of GML through tutorials and documentation.
  3. Start by creating simple projects like a basic platformer or a puzzle game.
  4. Gradually incorporate more complex mechanics as you become comfortable with the language.

Utilizing community resources such as forums and video tutorials can also accelerate your learning process.

While GML is powerful, it’s useful to compare it with other languages commonly used in game development:

Feature Gamemakerlanguage Unity (C#) Unreal Engine (C++)
Ease of Use High Moderate Low
Performance Good for 2D Excellent Excellent
Community Support Growing Extensive Extensive

Each framework has its strengths and weaknesses. GML is often preferred for 2D games due to its simplicity, while Unity and Unreal are more suited for 3D environments.

  • What is Gamemakerlanguage? GML is the scripting language used in GameMaker Studio for game development, allowing for event-driven programming.
  • Is GML suitable for 3D games? While GML is primarily designed for 2D games, it does offer basic 3D capabilities.
  • Can I use GML for mobile game development? Yes, GML supports exporting games to mobile platforms, making it versatile for various devices.
  • Are there any resources for learning GML? Yes, the official documentation, forums, and community tutorials provide valuable learning resources.
  • How do I debug my GML code? Use show_debug_message() to output values during runtime to help identify issues in your code.

In conclusion, leveraging Gamemakerlanguage to create compelling game mechanics is essential for building engaging games. By understanding core concepts, implementing advanced techniques, and being aware of common pitfalls, you can significantly enhance your game development process. As GML continues to evolve, staying updated with best practices and optimizing performance will ensure that your games not only captivate players but also stand the test of time. Happy coding!

PRODUCTION-READY SNIPPET

Even seasoned developers can run into issues while using GML. Here are some common pitfalls and how to address them:

  • Performance Issues: Complex scripts can slow down your game. Optimize by reducing the number of active objects and simplifying collision checks.
  • Debugging Challenges: GML lacks advanced debugging tools. Use show_debug_message() to output variable values and track the flow of your code.
⚠️ Warning: Always test mechanics in isolation to ensure they work correctly before integrating them into your game. This can save time and frustration.
PERFORMANCE BENCHMARK

Performance is crucial for player experience, especially in graphics-intensive games. Here are techniques to optimize GML performance:

  • Instance Management: Limit the number of active instances. Use instance_deactivate() to deactivate objects that are not currently needed.
  • Collision Detection: Use simpler shapes for collision checks (e.g., rectangles instead of complex polygons) to speed up calculations.
  • Reduce Draw Calls: Batch draw calls for objects sharing the same sprite to minimize overhead.
Open Full Snippet Page ↗
SNP-2025-0295 Bbcode Bbcode programming code examples 2026-04-08

How Can You Effectively Use Bbcode for Enhanced Online Communication?

▾
THE PROBLEM

In the world of online forums, message boards, and content management systems, Bbcode has long been a staple for formatting text and enhancing communication. Understanding how to effectively utilize Bbcode can significantly improve user interaction, making posts more engaging and visually appealing. But what exactly is Bbcode, and how can you master its usage? This post will explore the intricacies of Bbcode, its practical applications, and best practices to help you become proficient in this essential markup language.

Bbcode, or Bulletin Board Code, is a lightweight markup language primarily used to format posts in online forums. It allows users to apply styling to their text without needing to know HTML or CSS. Bbcode is parsed by the forum software, replacing tags with the corresponding HTML elements, making it a user-friendly option for enhancing text presentation.

The inception of Bbcode dates back to the early days of internet forums, where users needed a simple way to format their posts. As forums became more popular, the need for a standardized markup language became apparent. Bbcode emerged as a solution, providing a straightforward syntax that could be easily learned and implemented. Over the years, many variations of Bbcode have evolved, with different forums adopting their unique sets of tags.

Understanding the fundamental elements of Bbcode is crucial for effective usage. Bbcode tags typically come in pairs, with an opening tag and a closing tag. The most common tags include:

  • [b] for bold text
  • [i] for italic text
  • [u] for underlined text
  • [url] for hyperlinks
  • [img] for images

Each tag can also accept parameters, such as URLs for hyperlinks or image sources. The basic structure looks like this:

[b]This text is bold[/b]

Once you are comfortable with the basics, you can explore advanced Bbcode features such as nested tags and custom tags. Nested tags allow you to combine multiple styles within a single text segment:

[b][i]Bold and Italic Text[/i][/b]

Some forums also allow users to create custom tags, expanding the functionality of Bbcode. For instance, a forum might allow a custom tag for quoting another user:

[quote=user]This is a quote from another user.[/quote]

To maximize the effectiveness of Bbcode in your posts, consider the following best practices:

  • Keep it Simple: Use Bbcode sparingly. Overly formatted posts can become distracting.
  • Preview Your Posts: Always preview your posts to catch formatting errors before publishing.
  • Use Descriptive Link Text: Instead of using raw URLs, provide descriptive text for hyperlinks to enhance readability.

When using Bbcode, security should be top of mind, especially in forums that allow user-generated content. Here are some key considerations:

  • Sanitize Inputs: Always sanitize user inputs to prevent XSS (Cross-Site Scripting) attacks. Ensure that any URLs or images are validated.
  • Limit Tag Usage: Some forums restrict certain tags (like [script]) to enhance security. Familiarize yourself with these rules.

1. What is the difference between Bbcode and HTML?

Bbcode is simpler and more user-friendly than HTML, designed for non-technical users to format their posts easily. HTML offers more complex functionalities but requires a deeper understanding of web technologies.

2. Can I use Bbcode in all forums?

No, not all forums support Bbcode; some may use other markup languages or their proprietary formatting systems. Always check the forum's guidelines.

3. Is there a way to preview my Bbcode before posting?

Most modern forum platforms come with a preview feature, allowing you to see how your formatted text will appear before submission.

4. Are there any limits to Bbcode usage?

Yes, some forums may limit the types of tags available or restrict the length of posts. Always review the forum's specific rules regarding Bbcode usage.

5. How can I learn more about advanced Bbcode features?

Many forums have dedicated help sections or FAQs that detail the specific Bbcode tags supported. Additionally, community forums often provide insights and examples of advanced usage.

If you're new to Bbcode, here’s a quick-start guide to get you going:

  1. Familiarize yourself with the basic tags: [b], [i], [u], [url], [img].
  2. Practice using these tags in a text editor, then copy and paste into your forum post.
  3. Use the preview feature to check your formatting before submitting.

Understanding Bbcode is essential for enhancing online communication, especially in forum settings. By mastering its syntax and best practices, you can create engaging and visually appealing posts that resonate with your audience. With the tips and techniques outlined in this post, you’ll be well on your way to becoming a Bbcode expert. As the internet continues to evolve, Bbcode remains a relevant tool for effective online interaction, and your ability to use it proficiently will serve you well in the digital landscape.

PRODUCTION-READY SNIPPET

Despite its simplicity, Bbcode can lead to common mistakes that may hinder your formatting. Here are a few pitfalls and how to avoid them:

1. Forgetting Closing Tags: Always ensure that every opening tag has a corresponding closing tag. Missing closing tags can lead to unexpected formatting results.
2. Incorrect Syntax: Double-check your tag syntax. For example, using [url] without a proper URL will not work.

If you encounter an error, most forums provide feedback on formatting issues, guiding you on what went wrong.

REAL-WORLD USAGE EXAMPLE

Implementing Bbcode in your posts is simple. Most forum platforms have a WYSIWYG (What You See Is What You Get) editor that allows users to format text visually. However, knowing the syntax helps you understand what’s happening behind the scenes. Here’s how you can use Bbcode to create a simple formatted post:

[b]Welcome to the Forum![/b]
[i]This is an introduction to using Bbcode.[/i]
[url=https://www.example.com]Visit our website![/url]
[img]https://www.example.com/image.jpg[/img]
PERFORMANCE BENCHMARK

While Bbcode is lightweight, ensuring your posts are optimized is crucial for a good user experience. Avoid excessive use of images and rich media, as they can slow down page loading times. Additionally, be mindful of the size of the images you include, opting for smaller, compressed versions where possible.

Open Full Snippet Page ↗

PAGE 24 OF 47 · 469 SNIPPETS INDEXED