
Base Platform  /  Code Snippet Archive

Code Snippet & Reference Library

Practical how-to guides with code examples, from everyday languages like Python, JavaScript and SQL to many niche tools. Free to read online.

469
Guides Indexed
266
Languages & Tools
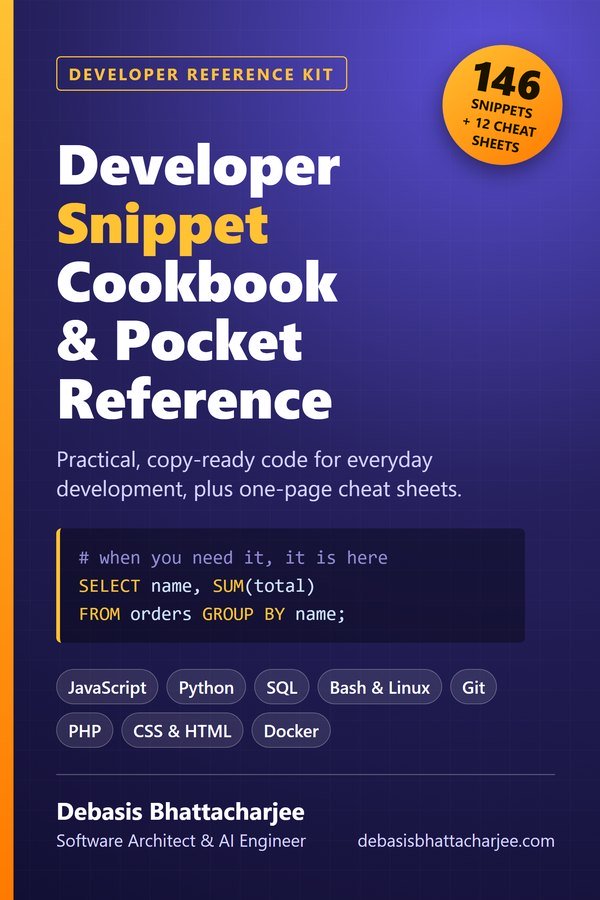
Developer Snippet Cookbook and Pocket Reference PDF cover
Developer Reference Kit · PDF

Developer Snippet Cookbook & Pocket Reference

  • 146 copy-ready snippets: JavaScript, Python, SQL, Bash & Linux, Git, PHP, CSS & HTML, Docker
  • Each one says when to use it, how it works and what to watch out for
  • 12 one-page cheat sheets for Git, Linux, cron, HTTP, SQL, regex and more
  • Code was checked with real tools, and the SQL was run against a sample database
$3.99 one-time · instant email delivery
2,000 Interview Questions & Answers cover
Also available: 2,000 Interview Questions & Answers $7.99 The questions developers get asked in interviews, across 89 topics, with short answers, in-depth explanations, common mistakes and follow-ups. See what's inside →

The material stays free to read online. This is the organised, offline, print-ready PDF edition. Secure payment by PayPal; your personal download link is emailed after payment is confirmed. Digital product, no shipping.

Showing 469 snippets

SNP-2025-0274 Abap Abap programming code examples 2026-03-29

How Can You Leverage ABAP's Object-Oriented Features for Effective Software Development? (2025-07-06 09:31:26)

▾
THE PROBLEM

ABAP (Advanced Business Application Programming) is a high-level programming language created by SAP for developing applications on the SAP platform. With the advent of object-oriented programming (OOP) concepts, ABAP has evolved significantly to meet modern software development needs. Understanding how to leverage ABAP's object-oriented features is crucial for developers looking to create efficient, maintainable, and scalable applications. In this post, we will explore the nuances of ABAP's OOP capabilities, practical implementation techniques, and the impact these features have on software development.

Originally, ABAP was designed for report generation and data manipulation within SAP systems. However, as business needs expanded and technology evolved, SAP introduced object-oriented programming constructs into ABAP in the late 1990s. This development allowed developers to create more modular, reusable, and organized code, aligning ABAP with modern programming paradigms. OOP in ABAP helps in encapsulating data and behavior into classes and objects, leading to a cleaner and more manageable codebase.

ABAP’s object-oriented features revolve around several core concepts:

  • Classes and Objects: A class is a blueprint for creating objects (instances). Each object can have its own state (data) and behavior (methods).
  • Inheritance: Classes can inherit attributes and methods from other classes, promoting code reuse and reducing redundancy.
  • Polymorphism: This allows methods to perform differently based on the object that invokes them, enhancing flexibility in code execution.
  • Encapsulation: This principle restricts direct access to some of an object's components, which helps in preventing unintended interference and misuse of the methods and data.

Inheritance allows you to create a new class based on an existing class, inheriting its properties and methods. This helps in extending functionality without modifying existing code. Here’s an example of how to implement inheritance in ABAP:

CLASS zcl_car DEFINITION INHERITING FROM zcl_vehicle.
  PUBLIC SECTION.
    METHODS: display_car_info.
  PRIVATE SECTION.
    DATA: number_of_doors TYPE i.
ENDCLASS.

CLASS zcl_car IMPLEMENTATION.
  METHOD display_car_info.
    CALL METHOD super=>display_info( ).
    WRITE: / 'Number of Doors:', number_of_doors.
  ENDMETHOD.
ENDCLASS.

In this example, zcl_car inherits from zcl_vehicle. The super=>display_info( ) method allows you to call the parent class’s method, demonstrating the concept of inheritance.

Polymorphism enables methods to perform differently based on the object type. In ABAP, this can be achieved through method overriding, allowing a subclass to provide a specific implementation of a method already defined in its superclass. Here’s how polymorphism works:

CLASS zcl_motorcycle DEFINITION INHERITING FROM zcl_vehicle.
  PUBLIC SECTION.
    METHODS: display_info REDEFINITION.
ENDCLASS.

CLASS zcl_motorcycle IMPLEMENTATION.
  METHOD display_info.
    WRITE: / 'This is a motorcycle'.
  ENDMETHOD.
ENDCLASS.

Here, the zcl_motorcycle class redefines the display_info method, showcasing polymorphic behavior. Depending on the object type, the correct method implementation is executed at runtime.

Tip: Always encapsulate your data by using private and protected attributes. This prevents external interference and protects the integrity of your objects.

When implementing OOP in ABAP, consider the following best practices:

  • Use Meaningful Names: Class and method names should be descriptive and follow a consistent naming convention.
  • Keep Classes Focused: Each class should have a single responsibility. Avoid creating large classes with multiple unrelated methods.
  • Document Your Code: Use comments and documentation strings to make your code more understandable for future developers.
  • Favor Composition Over Inheritance: Prefer creating classes that use other classes as components over deep inheritance hierarchies.

Security is a critical aspect of software development. Here are some best practices to ensure the security of your ABAP applications:

  • Sanitize Inputs: Always validate and sanitize user inputs to prevent SQL injection attacks.
  • Implement Authorization Checks: Use authorization checks to ensure that users have the necessary permissions to access certain methods or data.
  • Use Secure Coding Guidelines: Follow SAP's secure coding guidelines to mitigate common vulnerabilities.

1. What is the difference between a class and an interface in ABAP?

Classes can contain both data and methods, while interfaces can only define method signatures without any implementation. Interfaces promote a contract-based design, allowing different classes to implement the same methods in their unique ways.

2. How can I implement multiple inheritance in ABAP?

ABAP does not support multiple inheritance directly. However, you can achieve similar functionality by using interfaces. A class can implement multiple interfaces and provide the necessary method implementations.

3. What are the performance implications of using OOP in ABAP?

While OOP can introduce some overhead due to object management, the benefits of reusability and maintainability often outweigh the costs. It's essential to profile performance and optimize where necessary.

4. How do I handle exceptions in ABAP OOP?

ABAP supports exception handling using TRY...ENDTRY blocks. You can catch specific exceptions and handle them accordingly, ensuring that your application remains robust.

5. Can I use OOP features in classic ABAP programs?

Yes, you can use OOP features in classic ABAP programs. However, it’s more common to see OOP being utilized in more modern development approaches, such as Web Dynpro or SAP Fiori applications.

Leveraging ABAP's object-oriented features can significantly enhance software development, leading to more modular, maintainable, and scalable applications. By understanding core concepts such as classes, inheritance, polymorphism, and encapsulation, developers can create robust solutions that meet the evolving demands of businesses. Adhering to best practices and being aware of common pitfalls will lead to more efficient coding and a smoother development experience. As ABAP continues to evolve, embracing these OOP principles will prepare developers for future challenges while fostering innovation in SAP application development.

PRODUCTION-READY SNIPPET

Despite the benefits of OOP in ABAP, developers may encounter obstacles. Here are some common pitfalls and their solutions:

  • Overusing Inheritance: Relying too heavily on inheritance can lead to complex and hard-to-maintain code. Solution: Use interfaces and composition when possible.
  • Poor Encapsulation: Exposing too many public attributes can lead to unexpected changes. Solution: Always use private or protected access modifiers unless absolutely necessary.
  • Neglecting Performance: Object-oriented features can introduce overhead. Solution: Profile and optimize your code, especially in performance-critical areas.
REAL-WORLD USAGE EXAMPLE

To create a class in ABAP, you use the CLASS and ENDCLASS keywords. Here’s a simple example illustrating the creation of a class with attributes and methods:

CLASS zcl_vehicle DEFINITION.
  PUBLIC SECTION.
    METHODS: display_info.
  PRIVATE SECTION.
    DATA: vehicle_type TYPE string,
          color TYPE string.
ENDCLASS.

CLASS zcl_vehicle IMPLEMENTATION.
  METHOD display_info.
    WRITE: / 'Vehicle Type:', vehicle_type,
           / 'Color:', color.
  ENDMETHOD.
ENDCLASS.

In this example, we define a class zcl_vehicle with a public method display_info and private attributes vehicle_type and color. This encapsulation of data and methods is one of the key benefits of OOP.

After defining a class, you can create instances (objects) and call their methods. Here’s how you can instantiate the zcl_vehicle class and call its method:

DATA: vehicle TYPE REF TO zcl_vehicle.
CREATE OBJECT vehicle.
vehicle->display_info( ).

This snippet creates an object of the zcl_vehicle class and invokes the display_info method. It’s important to note that you must initialize the object before calling its methods.

PERFORMANCE BENCHMARK

Optimizing performance in ABAP applications is crucial, especially in enterprise environments where efficiency is paramount. Here are some techniques to enhance performance:

  • Minimize Object Creation: Reuse objects instead of creating new instances frequently.
  • Use Static Methods: For utility classes, consider using static methods to avoid the overhead of object instantiation.
  • Optimize Database Access: Reduce the number of database accesses by using buffered tables and batch processing techniques.
Open Full Snippet Page ↗
SNP-2025-0396 Md code examples Md programming 2026-03-28

How Can You Effectively Use Md Programming for Data Manipulation and Visualization?

▾
THE PROBLEM

In today's data-driven world, the need for efficient data manipulation and visualization is more critical than ever. As developers and data analysts seek tools that can streamline their workflow, the Md programming language has emerged as a powerful option. This post will delve into how to effectively use Md programming for data manipulation and visualization, addressing common challenges, best practices, and advanced techniques.

Md programming is a versatile language designed for data manipulation and visualization. It combines the simplicity of scripting with the power of structured programming, making it ideal for data analysts and developers alike. Md provides a range of libraries and frameworks that facilitate data manipulation, analysis, and visualization, similar to languages like Python and R.

Md is particularly well-suited for data manipulation due to its syntax, which is both expressive and intuitive. Here are some reasons why you might choose Md over other languages:

  • Simplicity: The syntax is easy to learn, making it accessible for beginners.
  • Flexibility: Md can seamlessly handle various data types and structures.
  • Performance: Optimized for speed, Md can process large datasets efficiently.
💡 Tip: Familiarize yourself with the basic syntax of Md to leverage its full potential in data manipulation.

To effectively manipulate data in Md, you need to understand its core concepts, including variables, data types, and data structures:

  • Variables: Variables are used to store data in Md. You can create variables easily using the syntax let variableName = value;.
  • Data Types: Md supports various data types, including integers, floats, strings, and arrays.
  • Data Structures: Common data structures in Md include arrays and objects, which allow you to organize data meaningfully.

If you are new to Md programming, here’s a quick start guide to help you set up your environment:

  1. Install Md: Download and install the Md interpreter from the official website.
  2. Create a New Project: Use the command md create myProject to set up a new project.
  3. Write Your First Script: Create a file named main.md and write a simple script:

let data = [1, 2, 3, 4, 5];
console.log(data);

Here are some common techniques you can use to manipulate data in Md:

  • Filtering Data: You can filter arrays using the filter method, which returns a new array containing elements that meet a specified condition.
  • Mapping Data: The map function allows you to transform each element in an array, applying a function to each element.
  • Reducing Data: Use the reduce method to accumulate values from an array into a single output.
✅ Best Practice: Always check for edge cases when filtering or mapping data to avoid unexpected results.

Once you have manipulated your data, visualizing it is crucial for deriving insights. Md offers several libraries for creating visualizations:

  • MdCharts: A powerful library for creating various types of charts, including bar, line, and pie charts.
  • MdGraph: Ideal for creating network graphs and relationships between data points.

To create a basic chart using MdCharts, follow these steps:


import MdCharts from 'mdcharts';

let data = [10, 20, 30, 40, 50];
let labels = ['A', 'B', 'C', 'D', 'E'];

MdCharts.createBarChart(data, labels);

This simple code snippet demonstrates how to create a bar chart with MdCharts. Make sure to explore other chart types and customization options available in the library.

When working with data, security should always be a priority. Here are some best practices for ensuring your Md applications are secure:

  • Sanitize Input: Always sanitize input data to prevent injection attacks.
  • Use HTTPS: Ensure that data transmission is encrypted using HTTPS.
  • Validate Data: Implement server-side validation for all input data before processing.

1. What are the main benefits of using Md for data analysis?

Md offers a simple syntax, flexibility in handling various data types, and optimized performance for large datasets, making it an excellent choice for data analysis.

2. Can I integrate Md with other programming languages?

Yes, Md can be integrated with languages like Python and JavaScript. You can call Md scripts from these languages and vice versa.

3. What types of visualizations can I create with Md?

With libraries like MdCharts, you can create bar charts, line graphs, pie charts, and many more types of visualizations to effectively represent your data.

4. Is Md suitable for real-time data processing?

Yes, Md can handle real-time data processing efficiently, especially when combined with optimizations like lazy loading and streaming data techniques.

5. Are there community resources available for learning Md?

Absolutely! There are numerous online resources, tutorials, and community forums dedicated to Md programming, where you can learn and share knowledge.

In summary, Md programming provides powerful tools for data manipulation and visualization, making it an excellent choice for developers and data analysts. By mastering the core concepts, leveraging the available libraries, and implementing best practices, you can effectively use Md to unlock valuable insights from your data. As the language continues to evolve, staying updated with its features will ensure you remain at the forefront of data analysis and visualization.

PRODUCTION-READY SNIPPET

As you work with Md programming, you may encounter common errors. Here are some frequent issues and how to resolve them:

Error Code Description Solution
TypeError Occurs when an operation is performed on an incompatible type. Check variable types and ensure that operations are valid for those types.
ReferenceError Occurs when a variable is not defined. Ensure that all variables are declared and initialized before use.
SyntaxError Occurs when the code violates the syntax rules of Md. Review your code for missing brackets, commas, or other syntax issues.
PERFORMANCE BENCHMARK

Optimizing the performance of your Md code is essential, especially when dealing with large datasets. Here are some techniques:

  • Minimize Loops: Avoid nested loops where possible, as they can significantly slow down execution time.
  • Use Built-in Methods: Leverage Md’s built-in methods like filter, map, and reduce for optimized performance.
  • Lazy Loading: Load data as needed rather than all at once, which can improve responsiveness.
⚠️ Warning: Always profile your code to identify bottlenecks before applying optimizations.
Open Full Snippet Page ↗
SNP-2025-0358 Idris code examples Idris programming 2026-03-28

How Can You Leverage Dependent Types in Idris to Enhance Code Safety and Reliability?

▾
THE PROBLEM

In the realm of programming languages, Idris stands out for its unique feature: dependent types. This advanced type system allows developers to express more complex invariants and properties within the type itself, leading to safer and more reliable code. But how exactly can you leverage dependent types in Idris to enhance code safety? This question not only addresses a fundamental aspect of Idris but also opens the door to deeper discussions on type theory, programming paradigms, and real-world applications.

Before diving into practical applications, it's crucial to grasp what dependent types are. In essence, dependent types allow types to be predicated on values. This means that you can create types that are sensitive to the data they operate on, enabling you to encode invariants directly into the type system.

For example, consider a simple list type that keeps track of its length:


data Vec : Nat -> Type -> Type where
    VNil  : Vec 0 a
    (::)  : a -> Vec n a -> Vec (S n) a

In this code snippet, Vec is a vector type that takes a natural number as its length. By doing this, we ensure that any operations on vectors can be verified at compile-time, significantly reducing runtime errors.

💡 Tip: Use dependent types to enforce invariants directly in your type declarations to catch errors early in the development process.

Idris was conceived by Edwin Brady as a means to explore and utilize dependent types in practical programming. The design of Idris is heavily influenced by the ideas in type theory and functional programming. The language was initially inspired by Agda and other dependently-typed languages but aims to provide a more user-friendly and practical environment for software development.

Understanding the historical context helps appreciate the evolution of dependent types and their significance in modern programming. Idris promotes a functional programming paradigm, emphasizing immutability and first-class functions, which are essential for harnessing the full power of dependent types.

To effectively use dependent types in Idris, one must understand several key concepts:

  • Type Families: These are types that can change based on their parameters, allowing for greater expressiveness.
  • Type-Level Programming: This involves using types as first-class citizens, enabling advanced techniques such as type-level recursion.
  • Proofs as Types: This principle states that programs can be seen as proofs of their correctness, bridging the gap between logic and computation.

By mastering these concepts, developers can create more robust applications that leverage the full potential of dependent types.

Once you're comfortable with the basics, you can explore more advanced techniques. One such technique is using dependent types for formal verification of properties in your code:


total : (n : Nat) -> (x : Vec n a) -> (y : Vec n a) -> Vec n a
total VNil VNil = VNil
total (x :: xs) (y :: ys) = x :: total xs ys

This total function takes two vectors of the same length and returns a vector of that length. The type signature enforces that both vectors must have the same length, ensuring that the operation is safe.

When leveraging dependent types, it's essential to consider security implications. A significant advantage of dependent types is their ability to enforce invariants that can prevent certain classes of bugs, such as buffer overflows or null pointer dereferences.

Here are some best practices for security:

  • Always validate external inputs using dependent types to ensure they conform to expected formats.
  • Leverage types to enforce security policies, such as access control in data structures.
✅ Best Practice: Use dependent types to encode security constraints directly into your type system, reducing vulnerabilities.

1. What are the main advantages of using dependent types in Idris?

Dependent types allow for more expressive type systems, enabling developers to encode invariants directly in types, which leads to safer and more reliable code.

2. How does Idris compare to other functional languages like Haskell?

While Haskell has a strong type system, it does not support dependent types natively. Idris allows for these advanced types, making it suitable for applications requiring high assurance of correctness.

3. Are there any performance concerns with using dependent types?

Yes, complex dependent types can introduce performance overhead. However, with careful design and optimization techniques, the impact can be minimized.

4. Can I use Idris for production systems?

Absolutely! Many developers are using Idris in production settings, especially in domains where correctness is critical, such as finance and safety-critical systems.

5. Where can I find resources to learn more about Idris and dependent types?

There are many resources available, including the official Idris documentation, online courses, and community forums where practitioners share insights and techniques.

Leveraging dependent types in Idris provides a powerful mechanism for enhancing code safety and reliability. By understanding the core concepts, implementing practical techniques, and being aware of common pitfalls, developers can create robust applications that stand the test of time. As the programming community continues to evolve, dependent types are becoming an increasingly valuable tool for ensuring code correctness and safety.

By investing time in mastering dependent types, you're not just learning a new language feature; you're adopting a new paradigm that can fundamentally change how you think about programming. So dive in, explore, and start leveraging the power of dependent types in your Idris projects!

PRODUCTION-READY SNIPPET

While dependent types offer numerous benefits, they also come with challenges. Some common pitfalls include:

  • Complex Type Signatures: As you start using dependent types, your type signatures can become quite complex, making them hard to read.
  • Overgeneralization: It’s easy to overuse dependent types, leading to convoluted code that can be difficult to maintain.

To mitigate these issues, consider the following strategies:

  1. Keep types simple and straightforward where possible.
  2. Document your types thoroughly to improve readability and maintainability.
⚠️ Warning: Always balance the use of dependent types with practical considerations for code maintainability and readability.
REAL-WORLD USAGE EXAMPLE

Let's look at a practical implementation of dependent types through a function that calculates the head of a vector:


head : {n : Nat} -> Vec (S n) a -> a
head (x :: xs) = x

Here, the type of the head function is constrained by the vector's length. It guarantees that the vector has at least one element (i.e., its length is at least 1), thus preventing runtime exceptions that would arise from trying to access the head of an empty list.

✅ Best Practice: Always define your functions with types that reflect their operational constraints to ensure safety and reliability.
PERFORMANCE BENCHMARK

Performance can be a concern when using dependent types, particularly with complex type computations. Here are some performance optimization techniques:

  • Avoid Unnecessary Type Computations: Ensure that types are only computed when necessary to minimize overhead.
  • Use Defunctionalization: Transform higher-order functions into first-order ones where applicable to improve performance.

Profiling tools can help identify bottlenecks in dependent type computations, allowing developers to optimize effectively.

Open Full Snippet Page ↗
SNP-2025-0272 CSS code examples Css programming 2026-03-27

How Can You Ensure Consistent Cross-Browser CSS Styles?

▾
THE PROBLEM

In the world of web development, CSS (Cascading Style Sheets) plays a crucial role in defining the look and feel of web applications. However, one of the most persistent challenges developers face is achieving consistent styling across different web browsers. This question is not just about aesthetics; it affects user experience, accessibility, and even SEO. As web developers, understanding how to manage cross-browser compatibility with CSS is essential for delivering high-quality applications.

To tackle the issue of cross-browser styling, it's important to first understand how different browsers render CSS. Browsers use rendering engines to convert HTML and CSS into visible web pages. Each engine—like WebKit (used by Safari), Gecko (used by Firefox), and Blink (used by Chrome)—interprets CSS rules with slight variations. This means that the same CSS code may result in different visual outcomes across browsers.

For instance, a flexbox layout could behave differently in older versions of Internet Explorer compared to modern browsers. Therefore, keeping up with browser updates and their compatibility is crucial for developers.

💡 Tip: Always check compatibility tables on websites like Can I Use to understand the support level of CSS features across different browsers.

Some CSS properties are notoriously inconsistent across browsers. Here are a few that every developer should be aware of:

  • Flexbox: While modern browsers have excellent support for flexbox, older versions of Internet Explorer do not.
  • Grid Layout: CSS Grid is widely supported, but older browsers may not recognize it.
  • Custom Properties: CSS variables are not supported in IE 11 and earlier versions.
  • Transitions and Animations: Different browsers may render transitions differently, particularly in terms of timing functions.

One effective approach to achieve consistency is using CSS resets or normalization stylesheets. A CSS reset removes default browser styling (like margins and padding), while a normalization stylesheet provides a more consistent baseline while preserving useful defaults.

Here’s a simple CSS reset that you can incorporate into your projects:

* {
    margin: 0;
    padding: 0;
    box-sizing: border-box;
}

A normalization stylesheet like Normalize.css is also a great option, as it makes browsers render all elements more consistently and in line with modern standards.

✅ Best Practice: Always start your projects with a CSS reset or normalization stylesheet to minimize inconsistencies.

Vendor prefixes are used to ensure compatibility for some CSS properties that are experimental or have limited support. A vendor prefix is a special code added to CSS properties to target specific browsers.

For example:

.box {
    -webkit-transition: all 0.5s ease; /* Safari */
    -moz-transition: all 0.5s ease; /* Firefox */
    -ms-transition: all 0.5s ease; /* IE */
    transition: all 0.5s ease; /* Standard */
}

Tools like Autoprefixer can automate this process, adding the necessary prefixes based on your target browsers.

Testing is one of the most critical steps in achieving consistent CSS styling. Utilizing browser testing tools can help developers check their designs across multiple browsers and devices. Here are a few popular tools:

  • BrowserStack: Offers real-time testing on various devices and browsers.
  • CrossBrowserTesting: Another comprehensive tool for testing across different environments.
  • LambdaTest: Allows you to run automated and live tests across multiple browsers.

Moreover, using tools like Chrome DevTools can help debug and test CSS issues directly in the browser.

⚠️ Warning: Always test on real devices and browsers, as emulators may not replicate the true behavior of CSS.

CSS frameworks can significantly reduce the complexity of cross-browser compatibility. Frameworks like Bootstrap, Foundation, and Tailwind CSS are built with browser testing in mind. They come with pre-tested components that ensure consistency across various environments.

For example, using Bootstrap’s grid system can help manage layouts without worrying about individual browser quirks:

<div class="container">
    <div class="row">
        <div class="col-md-6">Column 1</div>
        <div class="col-md-6">Column 2</div>
    </div>
</div>

By leveraging these frameworks, you can focus on the design and functionality of your application rather than the nitty-gritty details of browser compatibility.

When designing for the web, employing strategies like progressive enhancement and graceful degradation can help manage CSS inconsistencies. Progressive enhancement focuses on providing a baseline experience for all browsers, then adding enhancements for those that support advanced features. Conversely, graceful degradation designs for the latest browsers and ensures that older ones still receive a functional experience.

For instance, you can create a layout using Flexbox for modern browsers while providing a fallback using floats for older browsers:

.container {
    display: flex;
}

@supports not (display: flex) {
    .container {
        display: block;
    }
    .box {
        float: left;
        width: 50%;
    }
}

While CSS is primarily a styling language, it can still have security implications, especially when dealing with user-generated content. One common risk is CSS injection attacks. It’s important to ensure that styles applied to user content do not allow for malicious code execution.

To mitigate these risks, consider the following:

  • Sanitize User Input: Always sanitize any user-generated content before displaying it on your site.
  • Avoid Inline Styles: Inline styles can create security vulnerabilities and are harder to maintain.
  • Content Security Policy (CSP): Implement CSP headers to control which stylesheets can be loaded, limiting potential attacks.
💡 Best Practice: Regularly audit your CSS and HTML for possible security vulnerabilities.

1. What tools can help with cross-browser CSS testing?

Popular tools include BrowserStack, CrossBrowserTesting, and LambdaTest. These allow for real-time testing across multiple browsers and devices.

2. How do vendor prefixes work?

Vendor prefixes are specific codes added to CSS properties to ensure compatibility with certain browsers. For instance, `-webkit-` for Safari, `-moz-` for Firefox, and `-ms-` for Internet Explorer.

3. What are CSS resets, and why are they useful?

CSS resets are stylesheets that remove default browser styling, ensuring a consistent baseline across different browsers. They are useful for minimizing styling inconsistencies.

4. How can I improve the performance of my CSS?

You can minimize CSS file sizes, combine multiple CSS files, and use asynchronous loading techniques to improve performance.

5. What are common pitfalls in cross-browser CSS compatibility?

Common pitfalls include relying on unsupported CSS properties, not testing across browsers, and ignoring vendor prefixes. Always check compatibility and test thoroughly.

Ensuring consistent cross-browser CSS styles is a multifaceted challenge that requires a solid understanding of browser rendering, proactive testing, and strategic design practices. By utilizing CSS resets, vendor prefixes, normalization stylesheets, and performance optimization techniques, developers can significantly reduce the discrepancies between how their styles appear across different browsers. As the web continues to evolve, staying informed about best practices and emerging standards will remain essential. The tools and techniques outlined in this post will help you create a more resilient and consistent web experience for users, regardless of their browser choice.

PERFORMANCE BENCHMARK

Performance can impact how CSS is rendered across different browsers. Here are some optimization techniques to keep in mind:

  • Minimize CSS File Size: Use tools like CSSNano or CleanCSS to minify your CSS files.
  • Reduce HTTP Requests: Combine multiple CSS files into one to decrease load times.
  • Use Asynchronous Loading: Load non-critical CSS asynchronously using the `media` attribute.

By optimizing your CSS, you can improve loading times, which in turn enhances the user experience across various browsers.

Open Full Snippet Page ↗
SNP-2025-0062 Kotlin 2026-03-27

Kotlin Programming: A Comprehensive Expert-Level Guide

▾
THE PROBLEM

Kotlin is a modern programming language that was developed by JetBrains, officially released in 2011. It was designed to be fully interoperable with Java and to provide a more concise and expressive syntax. Kotlin has quickly gained popularity, particularly among Android developers, and was officially endorsed by Google as a first-class language for Android app development in 2017. Its primary purpose is to improve developer productivity while enhancing code safety and readability.

Some of Kotlin's key features include:

  • Interoperability with Java
  • Null safety
  • Extension functions
  • Coroutines for asynchronous programming
  • Data classes for simplifying model creation

To get started with Kotlin, you'll need to set up your development environment. The easiest way is to use IntelliJ IDEA, which is a powerful IDE from JetBrains that has built-in support for Kotlin. Follow these steps to set up your Kotlin environment:

  1. Download and install IntelliJ IDEA.
  2. Create a new project and select "Kotlin" as the project type.
  3. Configure the project SDK (Software Development Kit) - you can use the bundled JDK.

Alternatively, you can use Kotlin in an online environment via the Kotlin Playground, which allows you to write and execute Kotlin code directly in your browser.

Kotlin's syntax is designed to be more expressive and concise than Java. Here’s a simple "Hello, World!" example:

fun main() {
    println("Hello, World!")
}

In this example, fun is used to declare a function, and println is a standard library function for printing output to the console.

Kotlin supports various data types, including numbers, booleans, strings, and collections. Variables can be declared using val for immutable references and var for mutable references. Here’s an example:

fun main() {
    val immutableVariable: Int = 10
    var mutableVariable: String = "Hello"

    mutableVariable = "World" // This is allowed
    // immutableVariable = 20 // This would result in a compilation error
}

Kotlin provides several control flow constructs, including if, when, for, and while. The when statement is particularly powerful and can be used as a replacement for the traditional switch statement found in Java:

fun describe(obj: Any): String {
    return when (obj) {
        1 -> "One"
        "Hello" -> "Greeting"
        is String -> "String of length ${obj.length}"
        else -> "Unknown"
    }
}

One of Kotlin's standout features is extension functions, which allow you to add new functions to existing classes without modifying their source code. This can enhance code readability and organization:

fun String.addExclamation() = this + "!"

fun main() {
    val greeting = "Hello"
    println(greeting.addExclamation()) // Outputs: Hello!
}

Coroutines are a powerful feature in Kotlin that simplifies asynchronous programming. They allow you to write non-blocking code that looks sequential. Here is an example of using coroutines to perform a network request:

import kotlinx.coroutines.*

fun main() = runBlocking {
    launch {
        delay(1000L)
        println("World!")
    }
    println("Hello,")
}
💡 Always follow Kotlin coding conventions, which promotes readability and maintainability. Use meaningful names for variables, functions, and classes.

Adopt practices such as avoiding unnecessary use of !! for null safety, preferring the safe-call operator ?. instead:

val length: Int? = someString?.length

Additionally, leverage Kotlin's built-in tools for formatting and linting your code, like ktlint or the built-in formatting capabilities in IntelliJ IDEA.

Kotlin continues to evolve, with new features and enhancements being regularly introduced. The most recent versions have improved type inference, added support for functional programming paradigms, and enhanced tooling support. JetBrains is committed to making Kotlin a primary language for both mobile and server-side development, which positions it well for the future.

In conclusion, Kotlin is not just a language for Android developers; it’s a versatile language suited for various applications, including web development and data science. Its modern features, concise syntax, and strong community support make it a compelling choice for developers looking to improve their productivity and code quality.

COMMON PITFALLS & GOTCHAS

One common mistake in Kotlin is neglecting null safety, which could lead to null pointer exceptions. Another mistake is misusing extension functions, which can cause confusion if overused. Here’s an example of how extension functions can lead to issues if not carefully designed:

fun String.isNotEmpty(): Boolean {
    return this.length > 0 // This can cause confusion with the standard library function
}
PERFORMANCE BENCHMARK

When it comes to performance, Kotlin offers several techniques to optimize your code. One essential aspect is using inline functions, which can reduce the overhead of higher-order functions by avoiding object creation:

inline fun  List.myForEach(action: (T) -> Unit) {
    for (item in this) action(item)
}

Another optimization technique is using 'data classes', which automatically provide equals(), hashCode(), and toString() methods based on the properties declared in the primary constructor:

data class User(val name: String, val age: Int)
Open Full Snippet Page ↗
SNP-2025-0309 Cypher code examples Cypher programming 2026-03-27

How Can You Harness the Power of Cypher for Complex Graph Queries?

▾
THE PROBLEM

In the realm of databases, the rise of graph databases has revolutionized the way we think about data relationships. Among the languages designed specifically for querying graph databases, Cypher stands out as one of the most powerful tools available. But how can developers truly harness the capabilities of Cypher to manage complex queries effectively? This blog post will delve into the intricacies of Cypher programming, offering insights into its syntax, best practices, and performance optimization techniques. Whether you are a seasoned developer or a newcomer to the world of graph databases, this guide will provide you with the knowledge you need to leverage Cypher to its fullest potential.

Cypher was introduced by Neo4j, a leading graph database platform, around 2010. Its creation aimed to simplify the querying of graph data structures through a syntax that is intuitive and similar to SQL. Over the years, Cypher has evolved, becoming an integral part of graph databases, allowing developers to express complex graph traversals and queries with ease. Understanding its historical context not only helps in grasping its evolution but also highlights the community-driven improvements and adoption across various sectors.

At its core, Cypher is designed to work with nodes, relationships, and properties. Here’s a breakdown of these fundamental concepts:

  • Nodes: Represent entities in the graph, such as a person or a product.
  • Relationships: Connect nodes and signify how they are related. Relationships have a direction and can also have properties.
  • Properties: Key-value pairs that store information about nodes and relationships.

To construct a basic query in Cypher, you would typically use the following syntax:

MATCH (n:Person) RETURN n

This query finds all nodes labeled as "Person" and returns them. Understanding these foundational elements is crucial for building more complex queries as you progress.

Once you’ve mastered the basics, you can explore more complex queries. For example, using aggregation functions to count relationships:

MATCH (a:Person)-[:FRIENDS_WITH]->(b:Person) RETURN a.name, count(b) AS numFriends

This query counts the number of friends each person has, providing valuable insights into social dynamics. Another advanced technique is using the WITH clause to chain queries together, allowing for intermediate results to be processed:

MATCH (a:Person)-[:FRIENDS_WITH]->(b:Person) WITH a, count(b) AS numFriends WHERE numFriends > 5 RETURN a.name

This retrieves the names of individuals who have more than five friends, demonstrating how to filter results based on aggregated data.

To become proficient in Cypher, adhere to the following best practices:

  • Use Descriptive Names: Make node and relationship types meaningful to enhance readability.
  • Comment Your Code: Add comments to clarify complex queries, making it easier for others (or yourself) to understand later.
  • Leverage Parameters: Use parameters to optimize query performance and prevent injection attacks:
  • MATCH (n:Person {name: $name}) RETURN n
  • Regularly Review Queries: As your graph evolves, revisit and revise queries to ensure they remain efficient and relevant.

Security is paramount when working with any database, including graph databases. Here are some essential security practices:

✅ Use Parameterized Queries: This prevents injection attacks and ensures data integrity.

Always validate inputs before executing queries and limit user permissions to minimize exposure. Use Neo4j's built-in roles and privileges to enforce security policies effectively.

1. What is Cypher?

Cypher is a declarative graph query language for Neo4j, designed to allow for expressive and efficient querying of graph data.

2. How does Cypher compare to SQL?

While SQL is designed for relational databases, Cypher is tailored for graph databases, focusing on relationships between data points, making it more intuitive for graph structures.

3. Can I use Cypher with other graph databases?

Cypher is primarily associated with Neo4j, but some other graph databases have adopted Cypher syntax or offer compatibility layers.

4. How can I improve the performance of my Cypher queries?

Optimize your queries by indexing frequently accessed properties, using the WITH clause effectively, and analyzing query plans with EXPLAIN.

5. What tools are available for visualizing Cypher queries?

Tools like Neo4j Browser and Neo4j Bloom provide powerful visualization capabilities, helping to represent graph data interactively.

If you're new to Cypher, follow this quick-start guide:

  • Install Neo4j and set up your database environment.
  • Familiarize yourself with the Neo4j Browser interface for executing Cypher queries.
  • Start with basic queries to create nodes and relationships:
  • CREATE (a:Person {name: 'Alice'})
  • Explore graph patterns using MATCH queries.
  • Gradually incorporate advanced features like aggregations and subqueries.

In conclusion, mastering Cypher can significantly enhance your ability to work with graph databases. Whether you are querying simple relationships or analyzing complex interconnected data, Cypher offers powerful capabilities. By understanding its core concepts, practicing efficient implementation, and adhering to best practices, developers can unlock the full potential of graph data. Embrace the power of Cypher, and you'll find yourself better equipped to tackle the challenges of modern data management.

PRODUCTION-READY SNIPPET

As with any programming language, developers often encounter pitfalls. Here are some common mistakes when coding in Cypher, along with their solutions:

  • Missing Relationships: Forgetting to define relationships can lead to incomplete results. Always ensure that your MATCH statements include necessary relationships.
  • Using Wrong Data Types: Cypher is strict about data types. Ensure that you are using the correct types when filtering or creating nodes.
  • Neglecting Performance: Failing to optimize can result in slow queries. Regularly review and optimize your Cypher code using best practices discussed above.
REAL-WORLD USAGE EXAMPLE

Let’s take a closer look at how to implement basic and advanced queries with practical examples. Starting with a simple query to retrieve nodes based on specific criteria:

MATCH (n:Person {name: 'Alice'}) RETURN n

This query fetches the node representing the person named Alice. As you become more comfortable, you can incorporate relationships:

MATCH (a:Person)-[r:FRIENDS_WITH]->(b:Person) RETURN a, b

This retrieves all pairs of friends in the graph, showcasing how relationships can be traversed.

PERFORMANCE BENCHMARK

Optimizing query performance is crucial, especially when working with large datasets. Here are some tips to enhance the efficiency of your Cypher queries:

💡 Indexing: Create indexes on frequently queried properties to speed up searches.

For example, to index the name property of the Person nodes, you would use:

CREATE INDEX ON :Person(name)
⚠️ Avoid Cartesian Products: Be cautious of unintentionally creating Cartesian products by ensuring your MATCH clauses are properly structured.

Also, consider using EXPLAIN and PROFILE commands to analyze the execution plan of your queries:

EXPLAIN MATCH (n:Person)-[:FRIENDS_WITH]->(m:Person) RETURN n, m

These tools provide insights into how your queries are executed, helping you identify potential bottlenecks.

Open Full Snippet Page ↗
SNP-2025-0463 T4 vb code examples programming Q&A 2026-03-27

How Can You Effectively Utilize T4 VB for Code Generation in Your Projects?

▾
THE PROBLEM

T4 (Text Template Transformation Toolkit) is a powerful tool that allows developers to generate code dynamically using templates. When combined with Visual Basic (VB), T4 can significantly enhance productivity by automating repetitive coding tasks and ensuring consistency across your projects. But how can you effectively utilize T4 VB for code generation in your projects? This post aims to answer that question by providing a comprehensive exploration of T4 VB programming, including its core concepts, practical implementation details, best practices, and common pitfalls to avoid.

T4 stands for Text Template Transformation Toolkit, a feature of Visual Studio that enables developers to generate code and other text files using templates. T4 templates are essentially text files with embedded code that can be executed to produce output based on the input provided. This makes it a versatile tool for various tasks, from generating boilerplate code to creating configuration files.

Introduced in Visual Studio 2005, T4 was designed to simplify the process of code generation, which has been a crucial aspect of software development. With the rise of code generation frameworks like CodeSmith and others, T4 aimed to provide a more integrated and straightforward solution within the Visual Studio ecosystem. Over the years, T4 has evolved, allowing for more complex scenarios and integrations.

At its core, T4 operates on the principle of embedding code within text files. A T4 template typically consists of two parts: the text block and the control block. The text block contains the output text, while the control block allows for executing code logic. Understanding these blocks is crucial for mastering T4.

Here’s a simple example of a T4 template in VB:


<#@ template language="VB" #>
<#@ output extension=".txt" #>
<# 
    Dim names As String() = {"Alice", "Bob", "Charlie"}
    For Each name As String In names
#>
Hello, <#= name #>!
<# Next #>

This template generates a text file that greets each person in the names array.

Once you're comfortable with basic T4 templates, you can explore more advanced techniques:

  • Using External Assemblies: You can reference external libraries to enrich your templates. Use the assembly directive to include them.
  • Conditional Logic: Implement complex conditions to generate different outputs based on specific criteria.
  • Custom Host: Create a custom host for your T4 templates to control the execution environment and output.

Here's an example of using conditional logic to generate different classes based on input:


<#@ template language="VB" #>
<#@ output extension=".vb" #>
<#
    Dim entityType As String = "Admin" ' This could be determined dynamically
#>
Public Class <#= entityType #>
    Public Property Id As Integer
    Public Property Name As String
<#
    If entityType = "Admin" Then
#>
    Public Property Permissions As String()
<#
    End If
#>
End Class

To maximize the benefits of T4 VB, adhere to these best practices:

  • Keep Templates Simple: Avoid complex logic within your templates. Instead, extract logic into separate classes or methods.
  • Use Comments: Document your templates well to ensure that you and other developers can easily understand the logic.
  • Version Control: Track changes to your T4 templates just like you would for any other source code. This helps in maintaining historical context.

1. What file extension do T4 templates use?

T4 templates commonly use the .tt file extension.

2. Can T4 templates generate multiple files?

Yes, T4 can generate multiple files by using the Host object to manage the output.

3. How can I debug T4 templates?

You can debug T4 templates by adding System.Diagnostics.Debugger.Break() statements in your template code.

4. What is the difference between T4 and other code generation tools?

T4 is integrated into Visual Studio and allows for more seamless code generation with direct access to project files and assemblies, whereas other tools may require external configurations.

5. Can T4 templates access database schemas?

Yes, you can use ADO.NET or Entity Framework to access your database schema within T4 templates for generating code based on your database structure.

When using T4 templates, keep security in mind:

  • Input Validation: Ensure that any external input used in your templates is validated to prevent injection attacks.
  • Limit File Permissions: Restrict file permissions to prevent unauthorized access to generated files.
  • Avoid Hardcoding Sensitive Information: Never hardcode sensitive information like passwords or API keys within your templates.

Utilizing T4 VB for code generation can drastically enhance your development workflow, making repetitive tasks more manageable. By understanding the core concepts, implementing best practices, and avoiding common pitfalls, you can leverage T4 to its fullest potential. As you grow more comfortable with T4, explore advanced techniques and optimize your templates for performance and security. Embrace the power of T4 VB in your projects and watch your productivity soar!

PRODUCTION-READY SNIPPET

While T4 is a powerful tool, there are common pitfalls to watch out for:

⚠️ Template Execution Errors: Ensure your syntax is correct. T4 templates run in a specific context, and any errors can result in no output or runtime exceptions. Always check the output window for error messages.
⚠️ Performance Issues: Generating large files or complex structures can slow down the build process. Optimize your templates by limiting unnecessary iterations and calculations.

For instance, if you're generating hundreds of classes, consider breaking them into multiple templates to improve performance.

REAL-WORLD USAGE EXAMPLE

To implement T4 in your VB projects, follow these steps:

  1. Right-click on your project in Visual Studio, select Add, then New Item.
  2. Choose Text Template and name it appropriately.
  3. Write your template logic within the generated file.
  4. Run the template by saving the file, and the output will be generated based on your logic.

For example, you might want to generate a class file for each entity in your application:


<#@ template language="VB" #>
<#@ output extension=".vb" #>
<#@ assembly name="System.Core" #>
<#@ import namespace="System.Linq" #>
<#
    Dim entities As String() = {"User", "Product", "Order"}
    For Each entity As String In entities
#>
Public Class <#= entity #>
    Public Property Id As Integer
    Public Property Name As String
End Class
<# Next #>
PERFORMANCE BENCHMARK

To optimize the performance of your T4 templates, consider the following techniques:

  • Reduce Loop Complexity: Limit the number of iterations and checks within loops.
  • Cache Results: Store intermediate results in variables to avoid recalculating them multiple times.
  • Minimize External Calls: Avoid making unnecessary calls to external services or databases during template execution.
Open Full Snippet Page ↗
SNP-2025-0107 Context code examples Context programming 2026-03-26

How Can You Effectively Utilize Context in Modern React Applications?

▾
THE PROBLEM

In the realm of React development, the Context API often emerges as a powerful tool for managing state across components without the cumbersome burden of prop drilling. But how can developers leverage this feature effectively in modern applications? Understanding the Context API not only enhances component communication but also paves the way for cleaner, more maintainable code. This post delves deep into the practical application of Context in React, its advantages, challenges, and best practices.

Before React introduced the Context API in version 16.3, state management often relied heavily on prop drilling, where data is passed through multiple layers of components. This method, while functional, led to increasingly complex and less maintainable code as applications grew. The Context API emerged as a solution to this problem, allowing developers to share values across different components without the need for intermediate components to pass props manually.

The Context API consists of three primary components: React.createContext(), Context.Provider, and Context.Consumer. The createContext function is used to create a new Context object, while the Provider component is responsible for supplying the context value to its descendants, and the Consumer component allows access to the context value.

💡 Key Concept: The Context API is best utilized for data that is considered "global" for a tree of React components, such as user authentication, theming, or application settings.

Implementing the Context API begins with creating a context and defining a provider. Here’s a simple example demonstrating how to set up a theme context:

import React, { createContext, useContext, useState } from 'react';

// Create a Context for the theme
const ThemeContext = createContext();

// Create a Provider component
const ThemeProvider = ({ children }) => {
    const [theme, setTheme] = useState('light');

    const toggleTheme = () => {
        setTheme(prevTheme => (prevTheme === 'light' ? 'dark' : 'light'));
    };

    return (
        
            {children}
        
    );
};

// Custom hook to use the ThemeContext
const useTheme = () => useContext(ThemeContext);

// Example of using the ThemeProvider in your app
const App = () => {
    return (


    );
};

const ThemedComponent = () => {
    const { theme, toggleTheme } = useTheme();
    return (
        
); }; export default App;

While the basic implementation of Context is straightforward, advanced techniques can enhance performance and usability. One such technique involves memoization using React.memo or useMemo to prevent unnecessary renders.

import React, { createContext, useContext, useState, useMemo } from 'react';

const ExpensiveComponent = React.memo(({ value }) => {
    // Simulating an expensive computation
    const computedValue = useMemo(() => {
        // Perform expensive computation here
        return value * 1000;
    }, [value]);

    return 
{computedValue}
; });
✅ Best Practice: Use memoization techniques to avoid performance bottlenecks, especially when context values are derived from props or state.

When working with the Context API, especially when dealing with sensitive information such as authentication tokens, consider the following best practices to enhance security:

  • Encapsulate Sensitive Data: Avoid exposing sensitive data directly through the context. Instead, expose only necessary information and implement access controls.
  • Use Secure Storage: Store sensitive tokens in secure storage mechanisms (e.g., HttpOnly cookies) instead of React state.
  • Validate Context Values: Always validate the data passed to context providers to prevent unauthorized access.

If you're new to the Context API, follow this simplified guide to get started:

  1. Create a Context: Use createContext() to create a new context object.
  2. Set Up a Provider: Wrap your application or component tree with the Provider, passing the value to be shared.
  3. Access the Context: Use the Consumer component or the useContext hook to access the context value in any child component.

While the Context API is powerful, it’s essential to compare it with other state management solutions available in the React ecosystem:

Feature Context API Redux MobX
Complexity Simple Moderate Low
Performance Good with optimization Very good with middleware Excellent with observables
Boilerplate Code Minimal High Low
Learning Curve Low Steep Moderate

1. What is the Context API in React?

The Context API is a feature in React that allows developers to share values across components without prop drilling, providing a way to manage global state.

2. When should I use the Context API?

Use the Context API when you have data that needs to be accessible across multiple components, such as user authentication status, theming, or configuration settings.

3. Can I use the Context API for local state management?

While you can, it's generally recommended to use local state management for component-specific state and reserve the Context API for global state.

4. How does the Context API affect performance?

Improper use of the Context API can lead to performance issues due to unnecessary re-renders. It’s vital to optimize context values and limit context usage.

5. Is the Context API suitable for large applications?

Yes, but for very large applications with complex state management needs, it may be more beneficial to use dedicated state management libraries like Redux or MobX.

Effectively utilizing the Context API in React can significantly enhance your application's maintainability and performance. By understanding its core concepts, implementing advanced techniques, and avoiding common pitfalls, developers can create clean, efficient, and scalable applications. Whether you're building a simple component or a large-scale application, mastering the Context API is a valuable skill that will serve you well in your React development journey. Keep experimenting, stay updated with best practices, and always consider the trade-offs of each state management approach to find the solution that fits your needs best.

PRODUCTION-READY SNIPPET

Despite its advantages, developers often encounter pitfalls when using the Context API. One common issue is the overuse of context for every piece of state, leading to performance degradation. Here are some strategies to avoid this:

  • Limit Context Usage: Use context only for global state. Local component state should remain as props.
  • Separate Contexts: For distinct pieces of state, create multiple contexts instead of a single monolithic one.
  • Consider State Management Libraries: In larger applications, consider integrating Redux or MobX for more complex state management needs.
PERFORMANCE BENCHMARK

To ensure that your application remains performant while utilizing the Context API, consider implementing the following techniques:

⚠️ Warning: Frequent updates to context values can lead to unnecessary re-renders in the component tree. Use the following practices to mitigate this issue.
  • Batch Updates: Use functional updates to batch state updates and minimize re-renders.
  • Lazy Initialization: Use lazy initialization during the context setup for expensive calculations.
  • React Profiler: Utilize the React Profiler to identify performance bottlenecks related to context updates.
Open Full Snippet Page ↗
SNP-2025-0437 Jsx code examples Jsx programming 2026-03-26

How Can You Effectively Utilize JSX to Build Dynamic User Interfaces in React?

▾
THE PROBLEM

JSX, or JavaScript XML, has become a cornerstone of modern web development, particularly in the React ecosystem. But what exactly is JSX, and why is it so crucial for building dynamic user interfaces? In this comprehensive guide, we will delve into the intricacies of JSX, explore its syntax, and understand how it empowers developers to create robust web applications. By the end of this article, you will not only grasp the fundamentals of JSX but also master its advanced features, common pitfalls, and best practices.

At its core, JSX is a syntax extension for JavaScript that allows you to write HTML-like code within JavaScript files. This hybrid approach combines the advantages of HTML's declarative style with JavaScript's flexibility. JSX is commonly used with React to describe what the UI should look like, making it easier to visualize the structure of components and their relationships.

💡 Key Point: JSX must be transpiled into regular JavaScript code (using tools like Babel) before it can be executed by the browser.

JSX syntax is quite intuitive, allowing developers to embed expressions within curly braces. Here’s how you can write a simple JSX element:

const element = <h1>Hello, World!</h1>;

This snippet creates a React element that represents an h1 HTML tag containing the text "Hello, World!". The beauty of JSX lies in its ability to seamlessly integrate JavaScript expressions:

const name = 'Alice';
const greeting = <h1>Hello, {name}!</h1>;

Expressions within JSX make it incredibly powerful. You can use variables, functions, and even inline calculations. For example:

const sum = (a, b) => a + b;
const result = <p>The sum of 5 and 10 is {sum(5, 10)}.</p>;

This feature allows for dynamic content generation based on variable values, making your applications highly interactive.

JSX allows you to pass attributes to elements in a way that closely resembles HTML. However, there are a few differences to be aware of:

  • Use className instead of class.
  • Use htmlFor instead of for.

Here’s an example demonstrating these differences:

<label htmlFor="name">Name:</label>
<input type="text" className="input-field" id="name" />

One of the most powerful aspects of JSX is its ability to nest elements. You can pass children to components using JSX syntax:

<div>
  <h1>Welcome to My Site</h1>
  <p>This is a paragraph inside a div.</p>
</div>

JSX shines when used with React components. You can create reusable UI components that encapsulate their logic and presentation. Here’s a simple React component using JSX:

function Welcome(props) {
  return <h1>Hello, {props.name}!</h1>;
}

const element = <Welcome name="Alice" />;

In this example, the Welcome component takes a prop called name and renders it within an h1 element. You can easily reuse this component with different names.

When working with JSX, following best practices can help maintain code clarity and organization:

  • Keep components small and focused on a single task.
  • Use descriptive names for components and props.
  • Maintain a consistent formatting style for readability.
✅ Tip: Use tools like Prettier to automatically format your JSX code for consistency.

When using JSX, security is paramount. Always sanitize user input to prevent cross-site scripting (XSS) attacks. React automatically escapes values to prevent this, but it’s good practice to remain vigilant:

const userInput = "<script>alert('XSS')</script>";
const safeContent = <div>{userInput}</div>; // React escapes the input

JSX is most commonly associated with React, but how does it compare to similar concepts in other frameworks?

Framework JSX Equivalent Key Features
React JSX Declarative, component-based, virtual DOM
Vue Template syntax Reactive, easy integration, single-file components
Angular HTML templates Two-way data binding, dependency injection, modular
  • What is the purpose of JSX?
    JSX allows developers to write HTML-like syntax within JavaScript, making it easier to create and manage React components.
  • Can I use JSX without React?
    No, JSX is specifically designed to work with React. However, you can use similar syntax in other frameworks, but it won't have the same functionality.
  • Is JSX mandatory in React?
    No, you can write React applications without JSX, but it is highly recommended for its readability and ease of use.
  • How does JSX affect performance?
    JSX itself does not significantly impact performance, but improper use can lead to unnecessary re-renders and slow applications. Optimize by using techniques like memoization.
  • Can I use JSX in TypeScript?
    Yes, TypeScript supports JSX, and you can use type annotations to improve code quality and catch errors early.

If you're new to JSX, here’s a quick-start guide to get you up and running:

  1. Set up your development environment with Create React App.
  2. Create a new component using the function or class syntax.
  3. Write your JSX code within the return statement of your component.
  4. Import and use your component in the main application file.

JSX is an incredibly powerful tool that enhances the development experience in React. By allowing developers to write HTML-like syntax within JavaScript, it bridges the gap between design and logic. Understanding its syntax, attributes, and best practices can significantly improve your ability to build dynamic user interfaces. As you continue to explore JSX, keep the common pitfalls and optimization techniques in mind, and always prioritize security. With these insights, you'll be well on your way to mastering JSX and creating stunning React applications.

PRODUCTION-READY SNIPPET

While JSX is powerful, there are common pitfalls developers often encounter:

  • Misusing curly braces: Always remember to use curly braces only for JavaScript expressions. If you need to include a string, wrap it in quotes.
  • Returning multiple elements: If you need to return multiple elements from a component, wrap them in a single parent element, like a div or use React fragments.
PERFORMANCE BENCHMARK

JSX can affect the performance of your React applications. Here are some strategies to optimize your JSX usage:

  • Use memoization: Use React.memo for functional components to prevent unnecessary re-renders.
  • Lazy loading: Implement React's lazy loading for components that are not immediately needed.
Open Full Snippet Page ↗
SNP-2025-0469 Typescript code examples programming Q&A 2026-03-25

How Does TypeScript Enhance JavaScript Development for Large-Scale Applications?

▾
THE PROBLEM

In the ever-evolving landscape of web development, JavaScript has stood the test of time as a versatile and powerful programming language. However, as applications grow in complexity, developers often face challenges in maintaining and scaling their codebases. Enter TypeScript, a superset of JavaScript that introduces static typing and additional features to help developers manage large-scale applications more effectively. This blog post dives deep into how TypeScript enhances JavaScript development for large-scale applications, addressing key concepts, practical implementations, and best practices.

TypeScript is an open-source programming language developed by Microsoft that builds on JavaScript by adding optional static typing, interfaces, and other features. By compiling down to plain JavaScript, TypeScript allows developers to leverage its features while still being able to run their code in any environment where JavaScript is supported. This combination empowers developers to write more robust, maintainable code, especially important in large-scale applications.

TypeScript was first released in 2012 as a response to the growing need for better tooling and maintainability in large JavaScript applications. With the rise of single-page applications and complex frameworks like Angular, developers required a way to manage increasing code complexity. TypeScript's adoption has grown rapidly, with major frameworks like Angular and React fully supporting it, leading to a rich ecosystem of TypeScript-based projects.

Understanding the core concepts of TypeScript is crucial for leveraging its full potential. Here are some of the fundamental features:

  • Static Typing: TypeScript allows developers to define types for variables, function parameters, and return values, helping catch errors at compile time rather than runtime.
  • Interfaces: Interfaces in TypeScript provide a way to define contracts for classes and objects, ensuring that they adhere to a specific structure.
  • Generics: Generics enable developers to create reusable components that work with various data types while maintaining type safety.
  • Modules: TypeScript supports ES6 modules, allowing for better organization of code and easier maintenance.

TypeScript offers advanced programming techniques that can improve the development process. Here are a few noteworthy techniques:

Using Decorators

Decorators are a powerful feature in TypeScript that allows you to modify classes and their members at runtime. This can be particularly useful for implementing cross-cutting concerns like logging or authorization.


function Log(target: any, key: string, descriptor: PropertyDescriptor) {
    const originalMethod = descriptor.value;

    descriptor.value = function(...args: any[]) {
        console.log(`Calling ${key} with args: ${JSON.stringify(args)}`);
        return originalMethod.apply(this, args);
    };

    return descriptor;
}

class Calculator {
    @Log
    add(a: number, b: number): number {
        return a + b;
    }
}

const calc = new Calculator();
calc.add(5, 10);

In this example, we define a Log decorator that logs the arguments whenever the add method is called. This technique enhances code maintainability by separating concerns.

To maximize the benefits of TypeScript, developers should adhere to the following best practices:

✅ Consistent Typing: Always define types for function parameters and return values. This not only aids in maintainability but also improves code readability.
✅ Leverage Interfaces: Use interfaces to define object shapes and ensure consistency across your application.
✅ Enable Strict Mode: Turn on strict mode in your TypeScript configuration to catch potential issues early.

Security is paramount in web development, and TypeScript can help mitigate certain risks:

🔒 Type Safety: By utilizing TypeScript's type system, you can catch potential security issues at compile time.
🔒 Avoid 'any': Using 'any' can expose your application to runtime errors. Always strive for specific types.
🔒 Regular Updates: Keep TypeScript and its dependencies up-to-date to ensure you benefit from the latest security patches.

1. What are the main benefits of using TypeScript over JavaScript?

TypeScript offers static typing, better tooling support, improved maintainability, and enhanced readability, making it easier to manage large codebases compared to plain JavaScript.

2. Can I use TypeScript with existing JavaScript projects?

Yes, TypeScript can be gradually introduced into existing JavaScript projects, as it is a superset of JavaScript.

3. Are there any performance drawbacks to using TypeScript?

While TypeScript has a compilation step that can slightly increase build times, the benefits of type safety and maintainability often outweigh the downsides.

4. Is TypeScript suitable for small projects?

While TypeScript shines in large-scale applications, it can also be beneficial for small projects by improving code quality and developer productivity.

5. How can I configure TypeScript for a React project?

To configure TypeScript for a React project, you can use create-react-app with the TypeScript template by running npx create-react-app my-app --template typescript.

TypeScript has become an essential tool for modern web development, especially for large-scale applications. By enhancing JavaScript with static typing, interfaces, and advanced features, TypeScript empowers developers to build maintainable, robust applications. As the ecosystem continues to evolve, TypeScript's role in the development process is likely to grow even further, making it a valuable skill for developers in any domain. Remember to adhere to best practices, stay updated with the latest features, and embrace the power of TypeScript in your projects!

PRODUCTION-READY SNIPPET

While TypeScript significantly improves code quality, developers may encounter common pitfalls:

⚠️ Implicit Any: If you don't specify a type, TypeScript will infer it as 'any', which defeats the purpose of typing. Always specify types explicitly.
⚠️ Type Assertion: Be cautious with type assertions; misusing them can lead to runtime errors. Use them wisely to avoid bypassing TypeScript's type checking.
REAL-WORLD USAGE EXAMPLE

Let's explore how to implement TypeScript in a simple project. For this example, we will create a small application that manages a list of users.


// Define a User interface
interface User {
    id: number;
    name: string;
    email: string;
}

// Create a class that manages users
class UserManager {
    private users: User[] = [];

    addUser(user: User): void {
        this.users.push(user);
    }

    getUsers(): User[] {
        return this.users;
    }
}

// Usage
const userManager = new UserManager();
userManager.addUser({ id: 1, name: 'John Doe', email: 'john@example.com' });
console.log(userManager.getUsers());

In the code snippet above, we define an interface for users and a class that manages a list of users. The static typing helps catch errors early, such as passing an incorrect type to the addUser method.

PERFORMANCE BENCHMARK

Optimizing TypeScript performance can lead to faster compile times and better runtime efficiency:

  • Use Compiler Options: Adjust compiler options such as skipLibCheck and noEmitOnError to speed up the compilation process.
  • Tree Shaking: Utilize tree shaking techniques to remove unused code when bundling your application, reducing bundle size.
  • Code Splitting: Implement code splitting to load only the necessary parts of your application, improving initial load times.
Open Full Snippet Page ↗

PAGE 27 OF 47 · 469 SNIPPETS INDEXED