Interview Questions& Model Answers
Real questions. Real answers. Built from 20 years of actual hiring and being hired.
Curated by Debasis Bhattacharjee — Senior Software Architect & AI Engineer, Kolkata
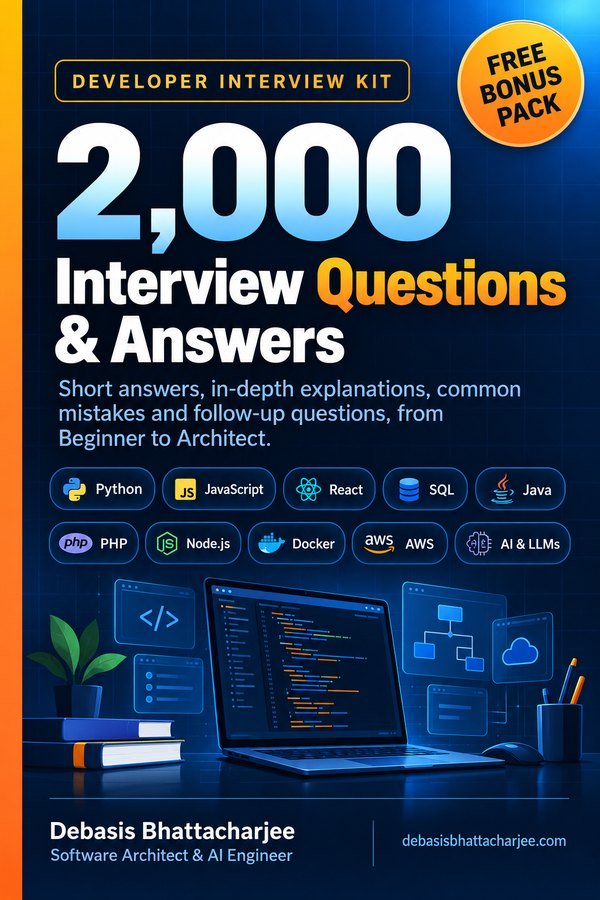
2,000 Interview Questions & Answers, in one PDF
- Short answers, in-depth explanations, common mistakes and follow-ups
- 89 topics, from Beginner to Architect, with a clickable contents list
- 226 extra questions that are not on this website
- Free Bonus Pack: 30-day study plan, behavioral questions, salary scripts

Get both books for $9.99 (save $2.99):
The material stays free to read online. This is the organised, offline, print-ready PDF edition. Secure payment by PayPal; your personal download link is emailed after payment is confirmed. Digital product, no shipping.
The 'Using' statement in VB.NET is designed to ensure that resources are disposed of properly. It automatically calls the Dispose method on the object once execution leaves the 'Using' block, which is crucial for managing resources like database connections or file streams.
The 'Using' statement is a control structure that simplifies the management of resources that implement the IDisposable interface. By wrapping the creation of such an object in a 'Using' statement, you ensure that once the block of code is exited, the object is disposed of automatically. This is particularly important in scenarios where unmanaged resources are involved, as failing to release them can lead to memory leaks and other resource contention issues. It effectively reduces boilerplate code because you don't need to explicitly call Dispose in a finally block, improving code readability and maintainability. One common edge case is handling exceptions; if an error occurs within the 'Using' block, the Dispose method is still called, ensuring that resources are cleaned up even in error conditions.
For instance, in a web application, you might use the 'Using' statement when opening a database connection. By placing the connection object within a 'Using' block, you ensure that once the operations are complete, the connection is promptly closed and disposed of, rather than relying on garbage collection. This is particularly crucial in high-traffic applications to minimize the risk of exhausting database connections and to ensure efficient resource usage.
A common mistake developers make is using 'Using' statements with objects that do not implement IDisposable, leading to confusion about the intended usage. This not only generates compiler warnings but also defeats the purpose of 'Using', which is to ensure proper resource management. Another frequent error is neglecting to nest 'Using' statements when multiple resources are involved; failing to do so can result in complex code and the risk of resource leaks if exceptions occur.
In a production environment, I've seen teams struggle with performance issues related to not properly managing database connections. Implementing the 'Using' statement across the codebase helped to significantly reduce connection pool exhaustion, leading to smoother operation of the application. This was particularly evident in a financial application under heavy load during peak hours, where proper resource management became critical.
Command substitution allows you to execute a command and use its output as a variable. It's beneficial when you need to capture output from a command to use later in your script, such as assigning the output of a file listing to a variable for processing.
Command substitution is done using either backticks or the preferred syntax $(command). This feature is powerful because it enables dynamic input into scripts, allowing developers to use the output of commands directly within variable assignments or as part of larger expressions. This can minimize the need for temporary files or multiple command calls. However, it's important to handle cases where the output might be empty or include unexpected whitespace, which can lead to errors in subsequent commands or logic flows. Choosing which syntax to use can also be relevant; the $(command) syntax is generally easier to read and handle, especially when nesting commands.
In a real-world scenario, a system administrator might use command substitution to gather the current disk usage of a directory and then take action based on that output. For instance, by using a command like `current_usage=$(du -sh /path/to/directory)`, they can capture the disk usage and then log it or trigger alerts if it exceeds certain thresholds, all within a single script run without creating temporary files for the command output.
A common mistake is using backticks for command substitution instead of the preferred $(command) syntax. Backticks can lead to confusing, nested commands and are harder to read. Another mistake is failing to quote the variable containing the command substitution, which can cause issues if the output includes spaces or special characters, leading to unexpected behavior in script execution.
I once saw a situation in a production setting where a script was supposed to check the status of various services and log their statuses. It used command substitution to gather output from system commands, but it did not properly handle cases where the commands returned unexpected empty output. This led to the script failing silently, which resulted in missed alerts for service outages until it was discovered weeks later.
In Dart, you can implement a custom sorting algorithm using the `sort()` method on lists by providing a comparison function. This allows you to define your own sorting logic based on specific criteria, which is useful for displaying data in a Flutter app according to user preferences.
Implementing a custom sorting algorithm in Dart typically involves defining a comparison function that dictates how two elements should be ordered. For example, if you have a list of objects, you can sort them based on a specific property, such as name or date. This is particularly useful in Flutter applications where user experience can significantly benefit from customized data presentation. Edge cases, like handling null values or ensuring stability in sorting, should also be considered to avoid unexpected behavior in the UI.
A common scenario is sorting a list of items displayed in a ListView widget. If the user wants to sort the items based on price or rating, your comparison function will dictate how those values are compared. Ensure your comparison logic is efficient; for large datasets, using algorithms like quicksort or mergesort can improve performance over bubble sort, for example, which is less efficient and not suitable for production use.
In a shopping app built with Flutter, you might have a list of products that users want to filter by price. By implementing a custom sorting algorithm through a comparison function, you can sort the product list dynamically based on user input. For instance, when a user selects 'Sort by Price', your comparison function can compare product prices and rearrange the list accordingly before displaying it in the UI, enhancing the user experience by making it easier to find affordable options.
One common mistake is not considering performance implications when choosing a sorting algorithm, particularly with large datasets. Developers may default to simpler algorithms without analyzing their efficiency. Another mistake is neglecting edge cases, such as how to handle null values, which can lead to runtime exceptions or unexpected sorting behavior. It's critical to ensure that the comparison function gracefully handles all potential input scenarios to maintain a robust application.
In a production environment, you might encounter a scenario where a Flutter app needs to display a list of items that users can sort by multiple criteria, such as price, rating, or alphabetical order. Ensuring that your sorting logic is efficient and correctly implemented can significantly affect the app's performance and user satisfaction. Users expect quick, responsive sorting, so a well-thought-out implementation is essential to meet their needs.
Indexing improves query performance by allowing the database to find data without scanning entire tables. However, it can increase write times and consume additional storage, so it's essential to consider query patterns and data update frequency when creating indexes.
Indexes are data structures that improve the speed of data retrieval operations on a database table at the cost of additional space and overhead during data modification operations. They work similarly to an index in a book, allowing the database engine to locate data efficiently. The most common types include B-trees and hash indexes, which serve different purposes depending on the query types. While indexes significantly reduce the time it takes to execute read queries, they can slow down write times (like INSERT and UPDATE operations) because the index must also be updated accordingly. Balancing read and write performance is crucial, and indexes should only be created for columns that are frequently queried, particularly in WHERE clauses or JOIN conditions.
In a mid-sized e-commerce application, we were experiencing slow query performance when retrieving product details based on user searches. To optimize the database, we added a B-tree index on the product name and category ID columns. This adjustment reduced the average query time from several seconds to milliseconds, significantly improving user experience. However, we monitored that the increased write time during product updates was minimal, as the trade-off was justifiable by the benefit of faster reads during peak traffic.
One common mistake is over-indexing, where developers create too many indexes, which can slow down write operations and consume excessive disk space. Another mistake is neglecting to analyze query performance; without understanding which queries are slow, developers may create unnecessary indexes. Lastly, not considering the data distribution when creating indexes can lead to poor performance gains; for instance, an index on a column with low cardinality may not be effective.
I once worked with a finance application that handled real-time transactions. After adding an index to the transaction date column, we noticed a significant improvement in querying historical data. However, as the data volume grew, we had to monitor the impact on insert performance, ensuring that write operations did not degrade due to the new index. A balance was crucial as the application scaled.
I encountered a merge conflict when two team members modified the same lines in a file. I first understood the changes made by each contributor using git diff, then discussed the implications with them before manually resolving the conflicts and committing the final version.
Resolving merge conflicts in Git requires not only technical skills but also strong communication among team members. When faced with a conflict, it's essential to analyze the differences between branches using git diff or a GUI tool, allowing for a clear understanding of each party's contributions. After pinpointing the conflicting areas, discussion can help clarify the intent behind changes, leading to a more informed resolution. In complex scenarios, agreeing on a solution that aligns with the project’s goals and maintaining the integrity of the codebase is crucial. This collaborative approach often leads to better outcomes and strengthens team dynamics, which is vital in a collaborative development environment.
In a recent project, we were implementing a new feature that required changes to a shared configuration file. Two developers made edits to the same section simultaneously, leading to a merge conflict when attempting to integrate their branches. I initiated a meeting where we reviewed their changes together. By understanding the context of each change, we were able to combine their edits logically, ensuring the feature was fully functional and both developers felt heard and respected in the decision-making process.
A common mistake is ignoring the context of changes when resolving conflicts, which can lead to overwriting important code or losing valuable features. In some cases, developers may also rush to resolve conflicts without communicating with those involved, causing misunderstandings or resentment. Additionally, failing to test the code after resolving conflicts can introduce bugs or regressions, undermining the reliability of the project. Each of these mistakes emphasizes the importance of thoroughness and collaboration during conflict resolution.
In a fast-paced development environment, it's common for multiple team members to work on overlapping features. I've seen situations where unresolved merge conflicts delayed release schedules or introduced errors into production. Having a robust process for addressing merge conflicts, including regular communication and code reviews, can mitigate these risks significantly and ensure a smoother workflow.
In Ruby, blocks are anonymous pieces of code that can be passed to methods, while procs and lambdas are objects that encapsulate blocks. The key differences are that procs are flexible with arguments and return behavior, whereas lambdas are strict about both. I would use blocks for iteration, procs for callbacks, and lambdas for any scenario requiring strict argument checking.
Blocks are code snippets that can be passed into methods but are not first-class objects, meaning you cannot assign them to variables. Procs, on the other hand, are objects that hold blocks and can be assigned to variables. One of the main differences between procs and lambdas is how they handle return statements: a return in a proc will exit the enclosing method, while in a lambda, it will only return from the lambda itself. Additionally, lambdas enforce the number of arguments strictly, while procs do not, allowing for more flexibility. These differences give developers control over flow and argument handling based on their needs in specific contexts. Understanding these distinctions can help one write more maintainable and bug-free code, especially in larger applications where behavior needs to be predictable and manageable.
In a web application, you might use a block when iterating over a collection of records to render a list of items. A proc could be employed as a callback for an event handler, allowing the same piece of code to be reused in multiple places without defining it multiple times. A lambda might be used when you need strict argument validation for a method, ensuring that only the right number of arguments are passed in, which is critical for methods that have a specific interface contract.
A common mistake is using procs when a lambda is needed, particularly when argument checking is critical, as this can lead to subtle bugs that may not manifest until runtime. Another mistake is returning from a proc expecting it to return only from itself; this can cause unexpected exits from entire methods, leading to logic errors and confusion. Developers may also confuse blocks with procs, forgetting that blocks cannot be stored and passed around like procs can, which can limit code reuse.
In a code review, you might encounter a situation where a developer uses a proc to handle a callback in an asynchronous operation. If they do not realize that a return statement will exit the main method, it could lead to unexpected behavior in the overall application flow. Understanding the differences between these constructs would be crucial for that developer to write robust and maintainable code.
JWTs, or JSON Web Tokens, are used for stateless authentication in APIs, where the server generates a token with user claims and sends it to the client. The client then includes this token in subsequent requests, allowing for easy scalability and reduced server load since no session information is stored on the server side.
JWTs enhance API authentication by enabling stateless interactions between clients and servers. Each token contains three parts: a header, payload, and signature, which can encapsulate user claims and expiration time. Since the server does not need to maintain session state, it simplifies scaling by allowing the API to be distributed across multiple instances without synchronization issues. Additionally, JWTs can be validated using the public key of the signing algorithm, ensuring data integrity and authenticity. One key consideration is token expiration; without a proper renewal strategy, there’s a risk of users being logged out unexpectedly, potentially impacting user experience.
In an e-commerce web application, when a user logs in, the server generates a JWT containing the user's ID and roles. This token is sent to the client and stored in local storage. For subsequent API calls, such as retrieving order history, the client includes this JWT in the Authorization header. The server verifies the token and extracts the user's identity, serving the appropriate data without needing to check a session store, thereby improving performance under load during high traffic events.
A common mistake developers make is not implementing proper expiration for JWTs, which can create security vulnerabilities by allowing compromised tokens to remain valid indefinitely. Another frequent error is neglecting to validate the token signature before processing requests, which can lead to unauthorized access if an attacker forges the token. Additionally, some may mistakenly believe that storing sensitive information in the payload is safe, while in reality, the entire token can be decoded, making it a risky practice.
In a recent project involving a mobile application that communicates with a REST API, we faced challenges when migrating from traditional session management to JWT-based authentication. Initial user complaints about unexpected logouts highlighted the importance of managing token expiration and refresh strategies. Implementing a refresh token mechanism significantly improved user experience by allowing users to stay logged in seamlessly while still maintaining security.
In React Native, component state can be managed using the useState hook for simpler state logic or useReducer for more complex state management. useState is great for local state updates, while useReducer is ideal when you have multiple state values that depend on one another or when state changes are more complex.
useState is straightforward and allows you to create a single state variable and a function to update it. It is suitable for simple scenarios where state changes are isolated and don't require a lot of computation or relationships between different pieces of state. On the other hand, useReducer makes it easier to manage state transitions, especially in larger applications where state logic is more intricate. It allows you to handle complex state updates through a reducer function, which can improve readability and make state transitions more predictable. Furthermore, useReducer can also improve performance for components that trigger deep updates, as it prevents unnecessary re-renders by keeping the state logic centralized.
Edge cases include managing state dependencies; while useState can lead to issues with stale state if not handled properly, useReducer keeps a more consistent flow of state changes. The choice between these two often boils down to the complexity of the component's state and the need for better control and scalability in state management.
In a project where I had to manage a form with dynamic fields and validations, I used useReducer to handle the state of the form data. Each field's state was managed in an object, and changes to one field could impact the overall form validity. By using a reducer, I could centralize all state transitions in one function, making it easier to manage dependencies and conditions for enabling the submit button. This resulted in a cleaner and more maintainable codebase as opposed to using multiple useState hooks.
One common mistake developers make is using useState for complex state management where useReducer would be more appropriate. This can lead to fragmented state logic and harder-to-maintain code. Another frequent issue is not understanding when to use useEffect with useState or useReducer, which can lead to unexpected behaviors, particularly with asynchronous state updates. It's crucial to recognize the impact of these hooks on the component's lifecycle and manage dependencies correctly to avoid stale closures.
In a recent project, we had a feature that involved a multi-step onboarding process for users. Each step required validating user input and managing the current state of the onboarding process effectively. We opted for useReducer to handle the various states of user inputs and transitions between steps. This decision proved vital when introducing more complexity, such as conditional steps based on previous answers, allowing us to maintain clear logic and improve user experience.
Indexing in SQL is used to improve the speed of data retrieval operations on a database table. It allows the database engine to find rows faster, significantly reducing the time it takes to execute queries, especially those with large datasets.
Indexes function similarly to an index in a book, allowing for quick navigation to the relevant data without scanning every row in a table. When a query is executed, the database can utilize the index to locate the required data quickly, leading to enhanced performance. However, while indexes optimize read operations, they can slow down write operations, as the indexes also need to be updated with each insert, update, or delete operation. Additionally, using too many indexes can lead to excessive use of storage and can degrade performance during data modifications. Therefore, balancing the number and type of indexes is crucial to maintaining optimal database performance.
In a retail database, if there's a table for customer orders with millions of entries, running a query to find orders by customer ID can take considerable time without an index. By adding an index on the customer ID column, the database can quickly locate the relevant orders, drastically improving query response time from several seconds to milliseconds. This is particularly useful during peak shopping times when many users might be querying the database simultaneously.
A common mistake is to create indexes on every column that is queried, leading to diminishing returns and increased overhead on write operations. Developers often overlook that while indexes speed up read operations, they can slow down data modifications. Another mistake is failing to analyze index usage periodically, which can result in having redundant or unused indexes, consuming unnecessary storage and affecting performance.
In a high-traffic e-commerce site, we experienced slow response times on user queries for product availability. After profiling our database queries, we found that adding indexes on frequently queried columns significantly improved the speed, allowing us to handle traffic spikes during sales events without degradation in performance. This adjustment was critical for maintaining a good user experience.
The main trade-off between using a linked list and an array for a stack is memory efficiency versus speed of access. An array offers constant time access for push and pop operations, but can require resizing, potentially leading to overhead. A linked list allows dynamic resizing without the need for resizing, but it consumes more memory due to pointers.
When considering a stack implementation using either a linked list or an array, it’s important to assess the requirements of your application. Arrays provide O(1) time complexity for push and pop operations as long as no resizing is necessary. However, when an array reaches its capacity, resizing requires creating a new, larger array and copying elements, which can lead to O(n) time complexity during that operation, affecting performance in situations with frequent pushes and pops. Linked lists, on the other hand, manage memory more flexibly since they can grow or shrink dynamically with each operation. This avoids the issue of resizing but at the cost of additional memory overhead, as each element requires extra space for a pointer. Moreover, linked lists can have slightly slower access times due to the need to dereference pointers, although the difference is often negligible in practice unless the stack becomes large or heavily utilized.
In a real-world application such as a web browser's back button functionality, a stack can be employed to keep track of pages visited. If implemented using an array, the browser may slow down significantly when a user navigates back and forth rapidly, because resizing the array can introduce computational overhead. In contrast, using a linked list can allow for quick addition and removal of page entries, ensuring a more responsive user experience even with frequent back and forward navigation.
One common mistake is assuming that arrays are always the better choice due to their fast access times. While this holds true under many circumstances, the need for resizing can lead to hidden performance costs. Another mistake is neglecting to consider memory usage; because linked lists require extra space for pointers, some developers might overlook that in memory-constrained environments, this could lead to increased resource utilization. Developers may also misjudge the impact of linked list traversal times in high-frequency operations, potentially leading to performance degradation.
In a scenario where an e-commerce platform is handling a large number of transactions, choosing the right data structure for managing the transaction stack is critical. If the application frequently needs to push and pop entries in the transaction history, a linked list might be preferred to ensure smooth performance under heavy use. Understanding these trade-offs can significantly affect responsiveness and user satisfaction during high traffic periods.
The 'final' keyword in Java indicates that a variable's value cannot be changed once it has been assigned. You might use it for constants, method parameters that should not be modified, or when declaring immutable classes.
In Java, the 'final' keyword serves as a modifier that can be applied to variables, methods, and classes. When applied to a variable, it ensures that its value cannot be reassigned after initial assignment. For example, if a variable is declared final, any attempt to assign a new value will result in a compilation error. 'final' variables are often used for defining constants to improve code readability and maintainability. When used with methods, it prevents overriding, which can be advantageous for ensuring certain behaviors in inherited classes. Lastly, when applied to classes, it prevents inheritance altogether, useful for creating unmodifiable objects.
However, developers should be cautious not to confuse 'final' with immutability. While 'final' ensures that the reference cannot be changed, it does not make the object it refers to immutable. For instance, a final reference to an array still allows elements within that array to be modified. Therefore, understanding the distinction is critical to avoiding mistakes in design.
In my previous role at a financial services company, we relied heavily on constants for various financial calculations. By declaring interest rates or tax values as final, we ensured that these values remained unchanged throughout the application, thus preventing any accidental modifications that could lead to significant errors in our calculations. This use of final variables contributed to safer code that's easier to read and understand.
One common mistake is using final for collection types without realizing that the contents of the collection can still change. For example, declaring a final List does not prevent you from adding or removing elements from that list; it only prevents the reference to the list from being reassigned. Additionally, developers might overlook the importance of using final for method parameters, which can lead to unexpected side effects if the parameter gets modified within the method, causing hard-to-track bugs. These mistakes highlight the need to fully understand the implications of the final keyword in different contexts.
In a scenario where multiple developers are working on a large codebase, enforcing the use of final for constants ensures consistency and prevents accidental changes that could introduce bugs. For instance, if a developer accidentally modifies a constant interest rate in a banking application, it could lead to significant financial discrepancies. By using final appropriately, teams can maintain code integrity and trust in their financial calculations.
The useEffect hook allows you to perform side effects in function components. It runs after the first render and after every update if its dependency array changes, which makes it ideal for fetching data or subscribing to events.
The useEffect hook is a fundamental part of React's functional component architecture. It accepts two arguments: a function that contains the code for the side effect and an optional array of dependencies. If the dependency array is provided, the effect will only run when one of the dependencies changes, which can optimize performance and prevent unnecessary renders. If you omit the dependency array, the effect runs after every render, which could lead to performance issues or infinite loops if not handled carefully. Additionally, the return value from the effect function can be used for cleanup, such as unsubscribing from a service or cancelling a timer when the component unmounts or before the effect runs again.
In a project managing user data, you might use the useEffect hook to fetch user information from an API when the component mounts. In the effect function, you would call the fetch API method and then update the local state with the fetched data. By including an empty dependency array, you ensure that the fetch operation only occurs once when the component is first displayed, preventing unnecessary network requests on subsequent renders.
A common mistake is to forget to include the dependency array or to mismanage it, resulting in effects running more often than needed. This can lead to performance issues or unintended data fetches that impact user experience. Another frequent error is attempting to perform asynchronous actions directly inside the effect function without properly managing promises or using async/await syntax, which can lead to unhandled promise rejections or data being set after the component has unmounted.
In a production setting, imagine you're building a dashboard displaying real-time data from multiple sources. Using the useEffect hook to manage the data fetching and subscription logic would be essential to ensure that components only update when necessary and that they clean up their side effects appropriately to avoid memory leaks.
In a previous project, I disagreed with a teammate about using a specific PHP framework. I initiated a discussion where we shared our perspectives and decided to create a small proof of concept to evaluate both approaches. This helped us choose the best solution together, strengthening our collaboration.
Disagreements on implementation approaches are common, especially in PHP development where multiple frameworks and methodologies can cater to the same needs. It’s crucial to approach such situations with open communication and a willingness to understand the other person's viewpoint. By proposing a collaborative proof of concept, you not only gather evidence to support your argument but also show respect for your teammate's expertise. This approach minimizes ego clashes and fosters a team-oriented atmosphere, which is vital for successful software projects. Additionally, resolving conflicts in this way can lead to better decision-making and improved project outcomes, as it combines diverse perspectives.
In one of my projects, a team member insisted on using Laravel for a new microservice, while I preferred Symfony for its performance benefits in this case. Instead of arguing, we agreed to build a minimal version of the service in both frameworks. This allowed us to highlight strengths and weaknesses, ultimately leading us to choose Symfony due to its superior handling of our specific use case. This decision not only helped us meet our performance goals but also strengthened our team's collaboration skills.
One common mistake developers make is allowing personal biases to cloud their judgment during disagreements, focusing more on winning the argument than on finding the best solution. This can lead to poor team dynamics and even delays in project timelines. Another mistake is failing to listen actively, which can exacerbate misunderstandings. Effective communication is key to resolving conflicts, and ignoring this can turn a simple disagreement into a significant issue that affects project delivery.
In a previous role at a software development company, we faced a critical point in a project where two developers had starkly different opinions on which PHP framework to use for a high-load application. This disagreement not only risked delaying the project but also affected team morale. It was essential to facilitate a resolution that would maintain team cohesion and support project timelines, showcasing the importance of collaborative problem-solving in production environments.
In Flask, database migrations are typically handled using Flask-Migrate, which is built on top of Alembic. You initialize the migrations, create migration scripts as your models change, and then apply those migrations to the database using command line tools.
Database migrations are crucial in maintaining the integrity and structure of your database as your application evolves. Flask-Migrate simplifies the process by integrating Alembic with Flask applications, allowing you to create migration scripts based on changes in your SQLAlchemy models. It tracks changes and provides a way to apply or revert migrations seamlessly. You can also manage version control of the database schema without losing data integrity. Additionally, it is essential to test migrations in a staging environment before applying them in production to avoid downtime or data loss due to potential issues in the migration scripts.
In a recent project, we used Flask-Migrate to manage changes in our database schema as our application evolved. Initially, we had a simple user model, but as requirements changed, we added fields like `last_login` and `profile_picture`. By running the Flask-Migrate command to create a new migration after updating the model, we generated a script that captured these changes. We then reviewed the migration script to ensure it was correct before applying it to our production database. This workflow helped us keep our database in sync with our application without losing existing user data.
One common mistake is forgetting to run migrations in a staging environment before applying them in production. This can lead to unexpected issues, like breaking changes or data loss. Another mistake is modifying migration scripts post-creation instead of generating new ones, which can result in inconsistencies and confusion regarding the database state. Additionally, some developers might neglect to check for existing data integrity during migrations, leading to potential crashes if the new schema conflicts with the old data.
In production, I've encountered scenarios where a rushed migration caused downtime because the changes were not tested properly. A new feature required a schema change, and the migration script failed due to unexpected data constraints. This scenario highlighted the importance of rigorous testing and staging before applying any database migrations to ensure a smooth transition without affecting users.
The time complexity of binary search is O(log n) because it repeatedly divides the search interval in half. In contrast, linear search has a time complexity of O(n) as it scans each element one by one until the target is found or the end of the array is reached.
Binary search operates on a sorted array by comparing the target value to the middle element of the array. If the target is equal to the middle element, the search is complete. If the target is less, the search continues in the left half; if greater, it continues in the right half. This halving of the search space leads to a logarithmic time complexity, O(log n), because the number of elements to search through is reduced exponentially with each step. In contrast, linear search checks each element sequentially, resulting in O(n) time complexity, as every element must potentially be checked. Therefore, binary search is significantly more efficient for large datasets, provided the data is sorted beforehand.
In a production environment, consider an e-commerce application where users frequently search for products. When implementing a search function, using binary search on a pre-sorted list of product IDs can drastically reduce response times compared to a linear search, especially as the product catalog grows. For instance, searching for a specific product ID in a catalog of one million products with binary search would involve only about 20 comparisons, whereas a linear search could require up to one million comparisons in the worst case.
One common mistake is to assume that binary search can be applied to unsorted data, which it cannot; the array must be sorted for binary search to work correctly. Another frequent error is misunderstanding how the logarithmic nature of binary search affects performance, leading to inflated expectations about its speed compared to linear search in smaller datasets, where linear search may actually perform well due to lower overhead.
In my experience, a team was tasked with optimizing an inventory lookup feature in a large retail system. Initially designed with linear search, the feature struggled with latency as the dataset grew. By switching to binary search on a sorted array of inventory items, we significantly improved lookup times, directly enhancing user experience and reducing server load during peak shopping hours.
PAGE 51 OF 119 · 1,774 QUESTIONS TOTAL
Debasis Bhattacharjee
20+ years building enterprise systems, ERP platforms, SaaS products, and AI-driven tools. Founder of DebMedia Technologies LLP. Mentor to 10,000+ developers across India and globally. These interview questions are drawn from real hiring panels, technical rounds, and two decades of engineering leadership.