Screen Recorder ++
Record your screen, webcam and audio — export in HD without watermark
Screen Recorder++ captures your Windows screen in full HD with system audio, microphone input and optional webcam overlay — no watermark and no time limits. Choose to record the entire screen, a specific monitor, a single application window or a custom-defined region. The webcam-in-picture overlay works with any connected camera and can be repositioned freely. A built-in annotation toolbar lets you draw, highlight and add text in real time during recording. Recordings export in MP4, AVI or GIF format at your chosen quality. Screen Recorder++ also includes a screenshot mode with annotation tools, making it a complete screen capture toolkit for tutorials, demos, support and content creation.
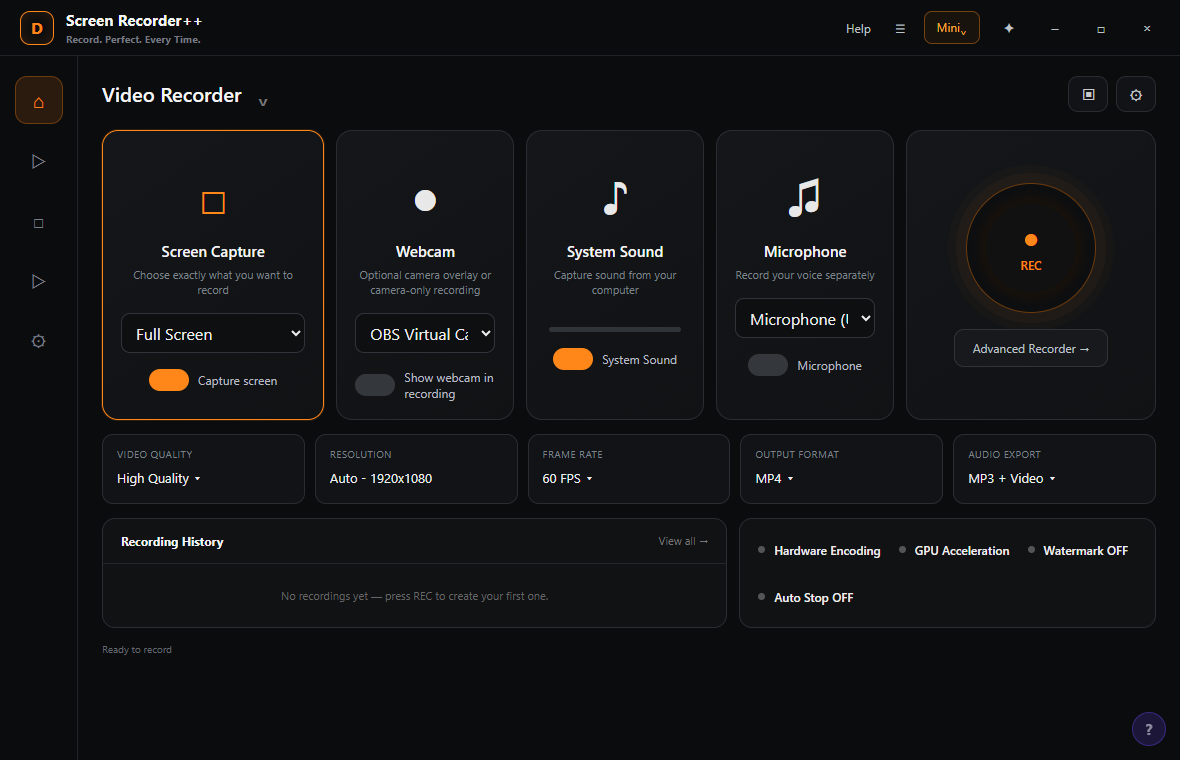
See Screen Recorder++ in Action
A clean, modern interface designed for real-world use.
Debmediascreenrecorder screen 01 screenshot
What Is Screen Recorder++?
Screen Recorder++ is a Windows screen recording application that captures everything happening on your display — your screen, your webcam, your system audio and your microphone — simultaneously, in a single recording. Built for GPU-accelerated encoding, it handles 1080p and 4K recordings at 60 frames per second without burdening your CPU, making it suitable for recording gameplay, software tutorials, video calls, presentations and any other on-screen activity without performance degradation.
The application combines professional-grade settings (hardware encoding, configurable bitrate, separate audio track export) with an accessible interface where every option is visible on one screen. Global hotkeys let you start and stop recording hands-free, and a compact system-tray toolbar keeps the app out of your way while a recording is in progress.
Screen-by-Screen Feature Walkthrough
1. The Main Recording Control Panel
The control panel organises every recording variable into a single, logical layout. Four capture source panels run across the top: Screen Capture (Full Screen, with a toggle to enable or disable), Webcam (showing the connected UBS Virtual Camera), System Sound (toggled ON to capture all audio playing through your speakers), and Microphone (showing the connected Microphone 0). Each source can be independently enabled or disabled — record just the screen, or add webcam and microphone for a full commentary recording. The REC button sits prominently in the top right, always one click away. Below the sources, a quality settings row exposes the key encoding parameters without burying them in a separate settings screen.
2. Quality and Format Configuration
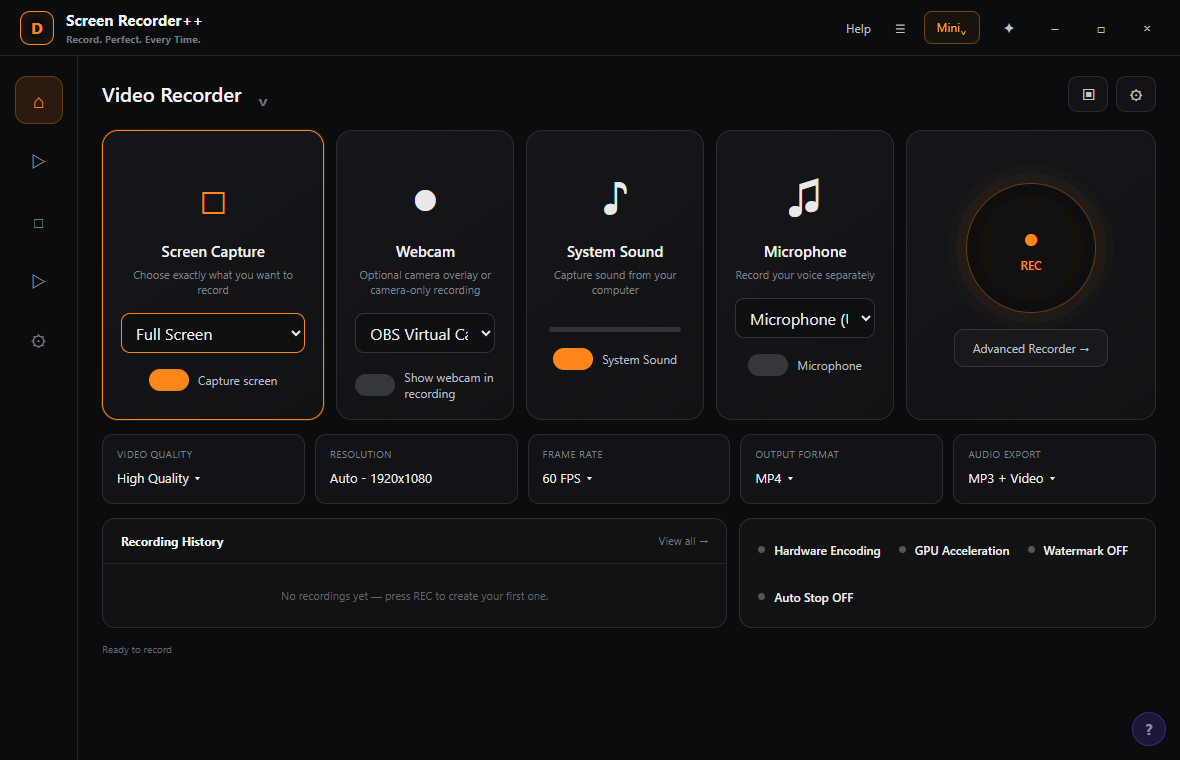
The quality row beneath the capture sources shows the current recording profile at a glance. Video Quality is set to High Quality, Resolution to Auto 1920×1080, Frame Rate to 60 FPS, Output Format to MP4, and Audio Export to MP4 + Video (combining audio and video in the same file). An Advanced row below adds Hardware Encoding (using your GPU to encode rather than the CPU), GPU Acceleration, Watermark Off, and Auto Stop OFF. These settings cover every recording scenario from quick screen shares to professional tutorial production without requiring multiple profiles or configuration presets.
3. All Sources Configured and Ready
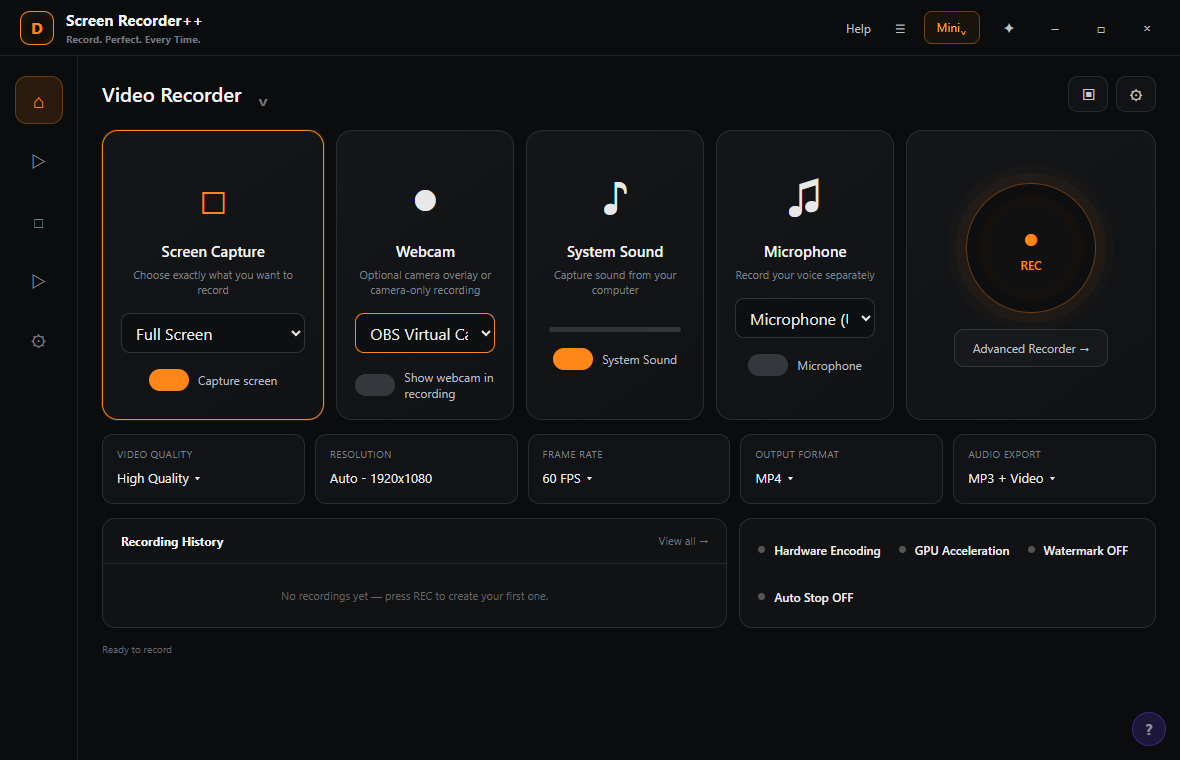
With all four capture sources configured — screen capture active, webcam ready, system sound on, microphone on — the app is set up for a full talking-head tutorial recording: your screen content, your face via webcam, the audio from any app you are demonstrating, and your spoken commentary, all captured in sync into a single MP4 file. The Recording History section at the bottom of the panel automatically logs completed recordings, so your recent output is always one click away without needing to navigate to the output folder manually.
4. Settings — Defaults, Hotkeys and Behaviour
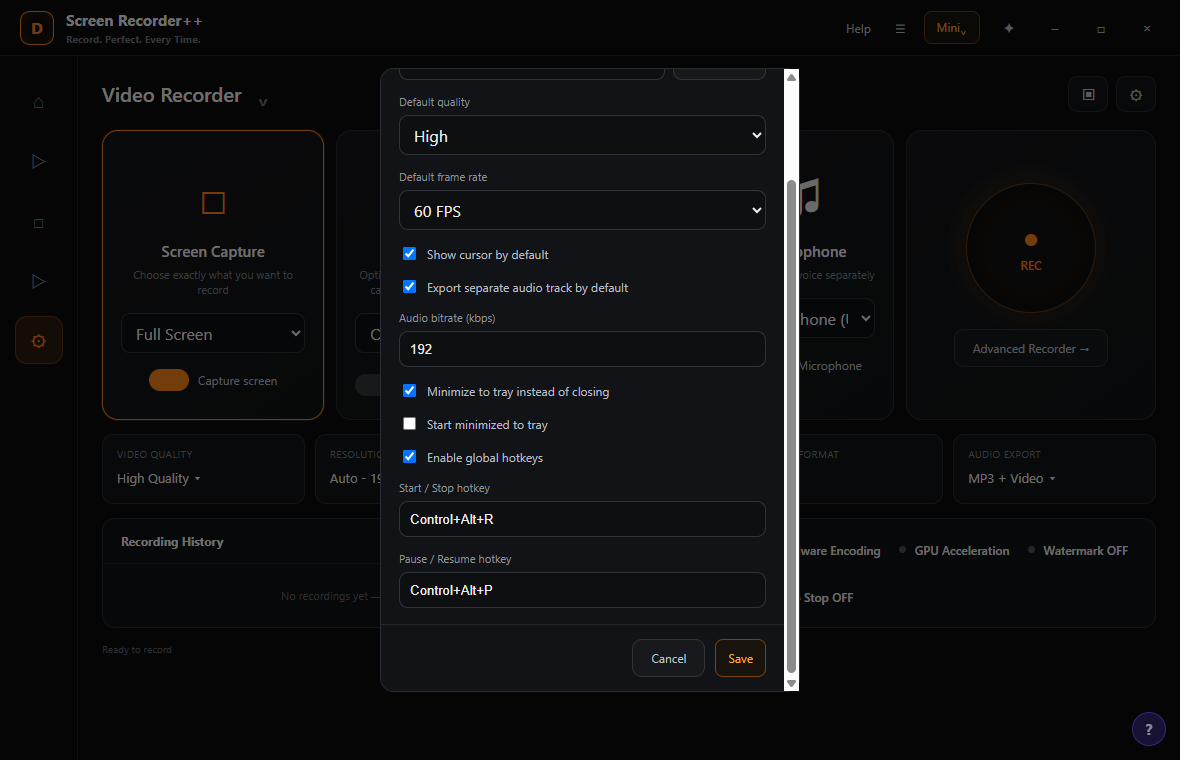
The Settings dialog gives you persistent control over the defaults used for every new recording. Default quality is set to High, default frame rate to 60 FPS. Show cursor by default is checked — useful for tutorials where mouse movement is part of the instruction. Export separate audio track by default is checked, producing an additional standalone audio file alongside the video for podcasters and voiceover producers who process audio separately. Audio bitrate is set to 192 kbps. Two tray behaviour options are checked: Minimize to tray instead of closing (keeping the app running for quick access) and Open minimized to tray. Global hotkeys are enabled with Control+Alt+R assigned to Start/Stop and Control+Alt+P to Pause/Resume — allowing completely hands-free recording control.
5. Output Folder Configuration
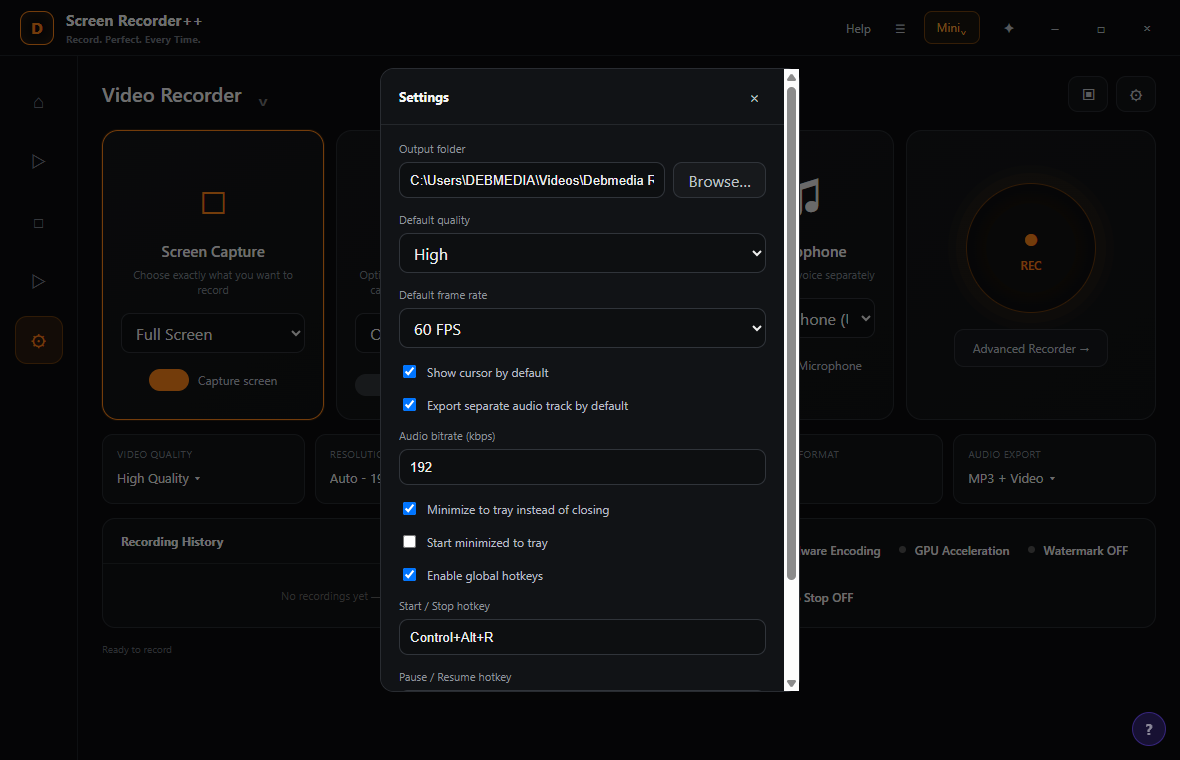
The top of the Settings dialog shows the Output Folder field — the directory where all recordings are saved automatically when a recording ends. The current path is set to a dedicated recordings folder, with a Browse button to change the destination with a single click. Keeping recordings in a dedicated folder prevents them from cluttering the Desktop or Downloads folder and makes the Recording History section at the bottom of the main panel more useful, as every past recording in that folder appears in the log automatically.
6. About Screen Recorder++
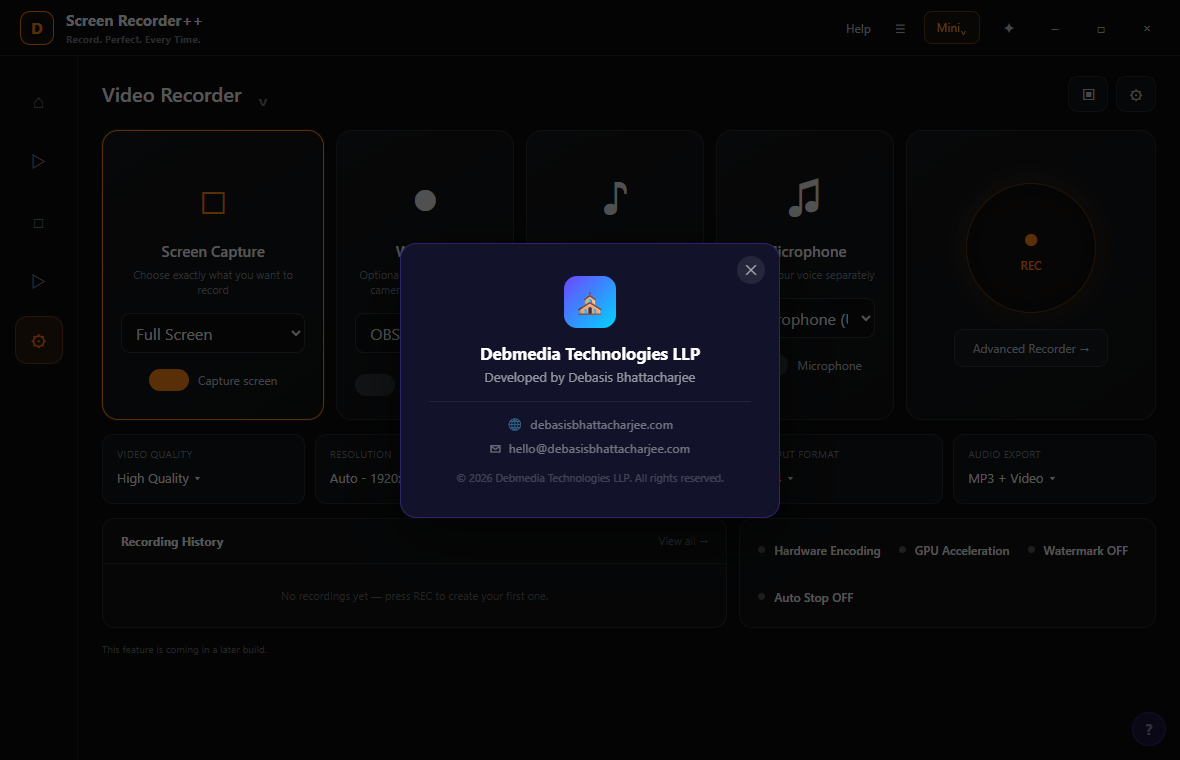
The About dialog confirms the application identity: Screen Recorder++ is developed and published by Debmedia Technologies LLP, developed by Debasis Bhattacharjee. The dialog displays contact details — email and the official website — for support and enquiries. It is accessible from the main settings panel.
7. Compact System-Tray Recording Toolbar

When Screen Recorder++ is minimised to the system tray, a compact floating toolbar appears — a small, unobtrusive bar showing the Screen Recorder++ icon, a status indicator (“Ready”), a red REC button to start recording immediately, and a settings icon. This toolbar is designed to sit at the edge of your screen during a recording session, giving you one-click recording control without the full application window occupying screen space. It is especially useful when recording full-screen content where switching to the main window would interrupt the recording subject.
Who Is Screen Recorder++ For?
- Tutorial and course creators — Capture software walkthroughs with screen, webcam and commentary all in one recording, ready for YouTube or a course platform.
- Remote workers and support teams — Record and share screen demonstrations instead of writing step-by-step instructions, saving time and reducing miscommunication.
- Gamers and streamers — GPU-accelerated encoding at 60 FPS captures gameplay without frame drops, and the system audio capture picks up in-game sound automatically.
- Presenters and trainers — Record live presentations or demos for async sharing with teams in different time zones.
- Podcast and voiceover producers — The separate audio track export gives you a clean audio file alongside the video, ready for post-production without re-recording.
System Requirements
- Operating System: Windows 10 (64-bit) or Windows 11
- Processor: Intel Core i5 / AMD Ryzen 5 or better
- RAM: 8 GB recommended
- GPU: DirectX 11 compatible with hardware video encoding support (NVENC / AMD VCE / Intel Quick Sync)
- Storage: 120 MB for the application (additional space for recordings — 1080p/60fps ≈ 1–2 GB per hour at High Quality)
- Display: 1280 × 720 minimum
- Internet: Not required
Frequently Asked Questions
Can I record just audio without video?
Yes. Disable the Screen Capture and Webcam sources, enable only System Sound and/or Microphone, and choose MP3 or WAV as the output format in the Audio Export setting. Screen Recorder++ will capture a standalone audio recording.
Does GPU-accelerated encoding affect video quality?
At High Quality settings, GPU-encoded recordings are visually indistinguishable from CPU-encoded recordings while using a fraction of the CPU resources. GPU encoding is always recommended unless you have a specific requirement for software encoding.
Can I pause and resume a recording?
Yes. The Control+Alt+P global hotkey pauses and resumes the current recording without creating a separate file. The final output is a single continuous file with the paused segments removed.
What happens to a recording if Screen Recorder++ crashes?
Screen Recorder++ uses a safe recording buffer that periodically flushes data to disk. In the event of an unexpected crash, any completed flush segments are recoverable from the output folder.
Professional Screen Recording Without the Complexity
Screen Recorder++ takes every decision that matters in a screen recording — format, quality, frame rate, audio sources, encoding method — and puts them on one screen, configured sensibly out of the box. If you need to change something, it is right there. If you do not, press REC and go.
From quick support clips to full tutorial series, Screen Recorder++ handles the capture so you can focus on the content. Download Screen Recorder++ now — no watermark on the trial, no cloud upload required.
Download Screen Recorder++
Record your screen, webcam and audio — export in HD without watermark